
1- How to download pylon setup file
2- PylonViewer installation for using Basler cameras
3- Getting Familiar with PylonViewer interface
Hardware: Applied to all Forecr Products
OS: Applied to all Jetpack 4.5 versions
In this blog post, we will explain "How to install pylon for using Basler industrial camera." This process will be the same for both DSBOX-NX2 and DSBOX-N2. The Basler industrial camera model that we are using " Basler acA2440 - 35 um ". Firstly, we must download the right version of Pylon software. Select the "pylon 6.1.3 Camera Software Suite Linux ARM 64 Bit " file.
https://www.baslerweb.com/en/sales-support/downloads/software-downloads/
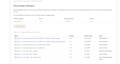
It is an obligation that giving some personal information before download the software.
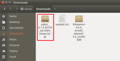
After download process is finished, you should see the compressed file like below.
In this point, we must create a directory by using terminal.
sudo mkdir /opt/pylon
After creation directory, we must extract the file.
sudo tar -xvzf ~/Downloads/pylon_6.1.3.20159_aarch64_setup.tar.gz -C/opt/pylon
sudo chmod 755 /opt/pylon
cd /opt/pylon
sudo tar -xvzf pylon_6.1.3.20159_aarch64_setup.tar.gz
After extract the compressed file, there is "INSTALL" file which summarize the installation process.
To use USB cameras, we should install the udev-rules to set up permissions for Basler USB cameras by calling:
sudo /opt/pylon/share/pylon/setup-usb.sh
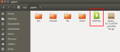
Click the "pylonviewer" executable file.
Please pay attention that USB port should 3.0 version.
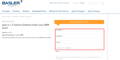
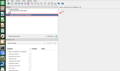
Then the user interface window opens. Click the "Basler acA2440-35um" option under USB title.
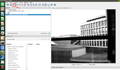
For taking the single shot, press the symbol which is shown on the below. Then we should see the single shot on the right side of the window.
For continuous shots, press the symbol which is shown below.

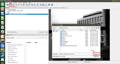
For saving the image, press the save symbol which is located on the right upside the window, then set the path location and press save button.
Thank you for reading our blog post.