Preparing A DeepStream Application on DSBOX-NX2
WHAT YOU WILL LEARN?
1- Building the custom DeepStream application
2- Setting the configuration file
3- Adding logo to the DeepStream application
ENVIRONMENT
Hardware: DSBOX-NX2
In this tutorial, we will make our own DeepStream application which includes centered transparent logo.
First of all, we need a DeepStream SDK installed DSBOX-NX. Next, we prepare and configure our own DeepStream application with CMake. Finally, we add transparent logo on application window.
If you have not installed DeepStream SDK yet, you can install it from here. In this quick guide, you can install DeepStream SDK in 3 ways: Using NVIDIA SDK Manager, the DeepStream tar package and the DeepStream Debian package.
Building the custom DeepStream application
In our CMake project, we need GStreamer RTSP Server source files at
• https://github.com/thaytan/gst-rtsp-server
two specific source files at (in /opt/nvidia/deepstream/deepstream/sources/apps folder)
• /apps-common/src/deepstream_osd_bin.c
• /apps-common/includes/deepstream_osd.h
model files' folder at
• /opt/nvidia/deepstream/deepstream/samples/models/Primary_Detector
and (two) configuration files at (in /opt/nvidia/deepstream/deepstream/samples/configs/ deepstream-app folder)
• /config_inter_primary.txt
• /source30_1080p_dec_infer-resnet_tiled_display_int8.txt
In Terminal, install json-glib with
sudo apt install libjson-glib-dev libjson-glib-1.0-0 libglib2.0-dev
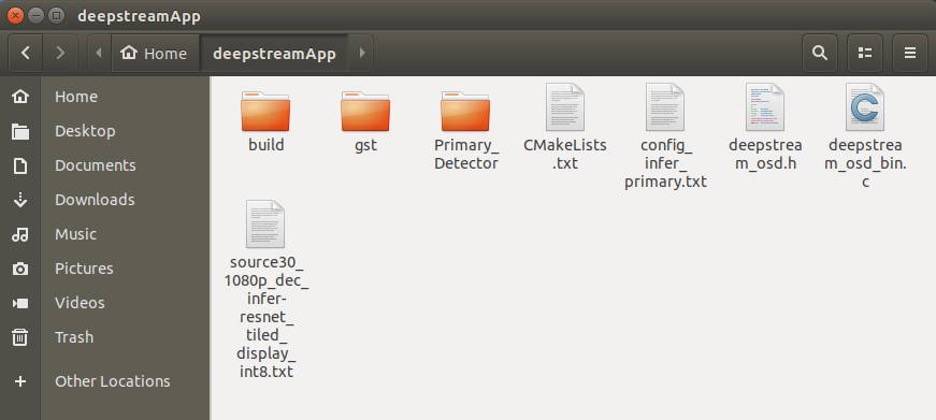
Create “deepstramApp” folder and copy gst folder from GitHub downloaded zip file, model files' folder, two source files and two configuration files into this new folder. Create "build" folder and "CMakeLists.txt" file in “deepstramApp” folder. (*You can create with using commands in Terminal)
Install the video and the logo which are used from the DOWNLOADS section of the post to deepstreamApp folder.
After that, we configure our CMakeLists.txt file in our project folder.
Setting the configuration file
cmake_minimum_required(VERSION 2.8)
project(DeepstreamApp)
set(CMAKE_CXX_FLAGS "${CMAKE_CXX_FLAGS} -DPLATFORM_TEGRA")
set(SRC_PATH /opt/nvidia/deepstream/deepstream)
set(SRC_FOLDER ${SRC_PATH}/sources/apps/sample_apps/deepstream-app)
set(SRC_INC ${SRC_PATH}/sources/apps/apps-common/includes)
set(SRC_INC2 ${SRC_PATH}/sources/includes)
set(SRC_SRC ${SRC_PATH}/sources/apps/apps-common/src)
include_directories(${PROJECT_SOURCE_DIR}
${SRC_FOLDER}
${SRC_INC}
${SRC_INC2}
${SRC_SRC}
/usr/include
/usr/include/gstreamer-1.0
/usr/include/glib-2.0
/usr/lib/aarch64-linux-gnu/glib-2.0/include
/usr/include/json-glib-1.0)
link_directories(${SRC_PATH}/lib
/usr/lib/aarch64-linux-gnu
/usr/lib/aarch64-linux-gnu/gstreamer-1.0)file(GLOB SRCS1 ${SRC_FOLDER}/*.c ${SRC_FOLDER}/*.h ${SRC_INC}/*.h ${SRC_INC2}/*.h ${SRC_SRC}/*.c)
list(REMOVE_ITEM SRCS1 "${SRC_INC}/deepstream_osd.h")
list(REMOVE_ITEM SRCS1 "${SRC_SRC}/deepstream_osd_bin.c")
file(GLOB SRCS2 ${PROJECT_SOURCE_DIR}/*.c ${PROJECT_SOURCE_DIR}/*.h)
#message("sources1 ${SRCS1}")
#message("sources2 ${SRCS2}")
add_executable(deepstreamApp ${SRCS1} ${SRCS2})
target_link_libraries(deepstreamApp -lnvdsgst_meta -lnvds_meta -lnvdsgst_helper -lnvds_utils -lnvds_msgbroker -lgstrtp-1.0 -lX11 -lm -lgstreamer-1.0 -lgstrtspserver-1.0 -lglib-2.0 -lgobject-2.0 -lgstvideo-1.0 -lnvdsgst_smartrecord -ljson-glib-1.0)
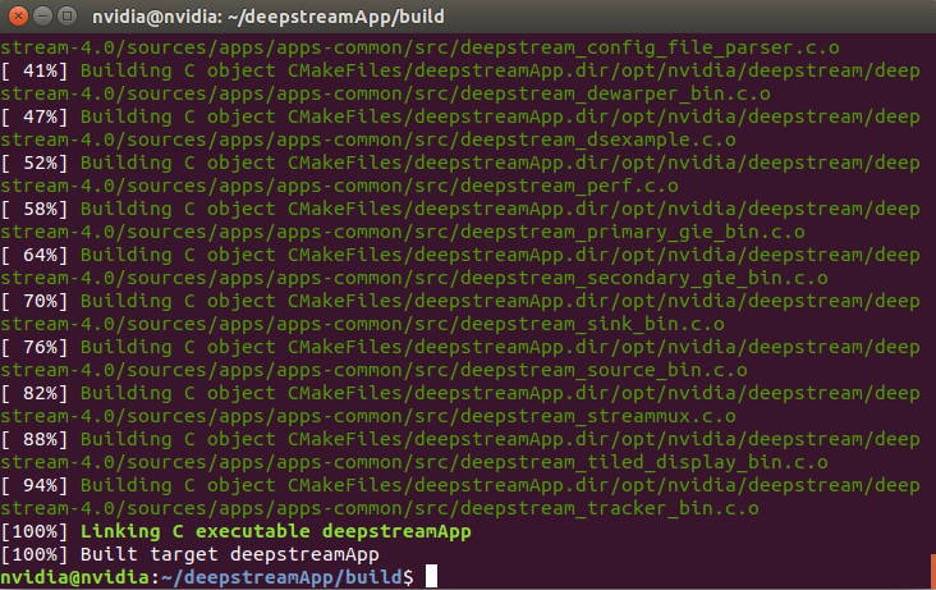
In build folder, open terminal and type
cmake .. && make
Set Your Configuration File & Build Again
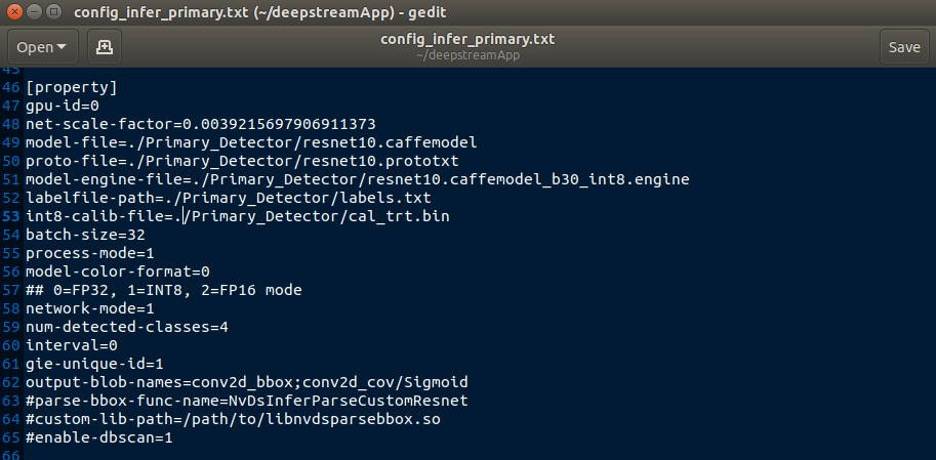
Change "config_infer_primary.txt" file as the picture under the sentences
Change the name of "source30_1080p_dec_infer-resnet_tiled_display_int8.txt" as "test_1080p_dec_infer-resnet_tiled_display_int8.txt". In this file, we will change tiled-display, source(s), sink0, streammux and primary-gie blocks.
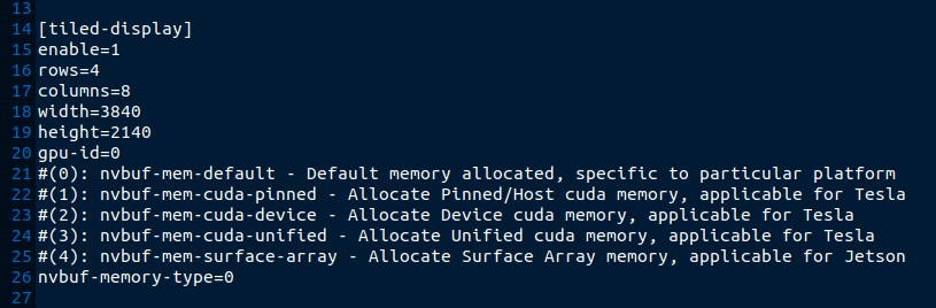
In [tiled-display] block, change row, columns, width and height part as the picture below
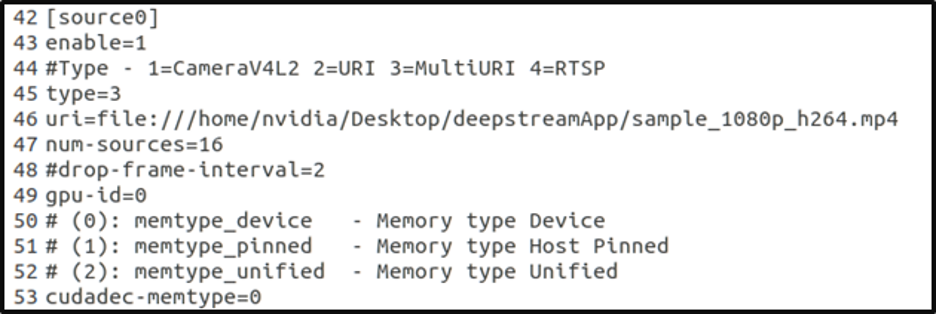
In sources blocks, there are 32 sources (from source0 to source31) have their own URI file paths.
In this picture, [source 0] is an example of other sources' style. Each source changes only its URI path as the picture below.
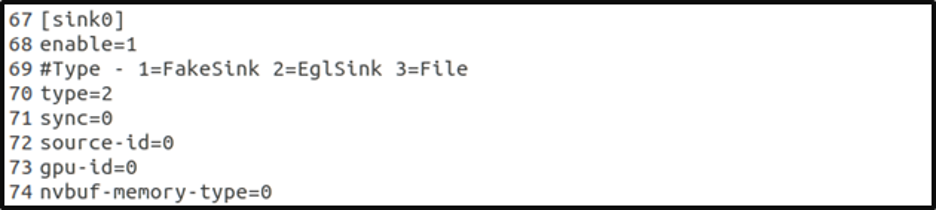
In [sink0] block, change sync value as the picture below.
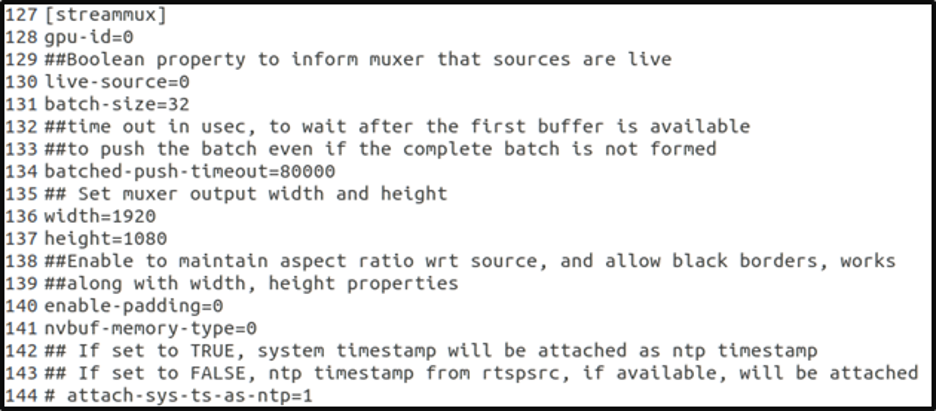
In [streammux] block, change batch-size and batched-push-timeout values as the picture below.
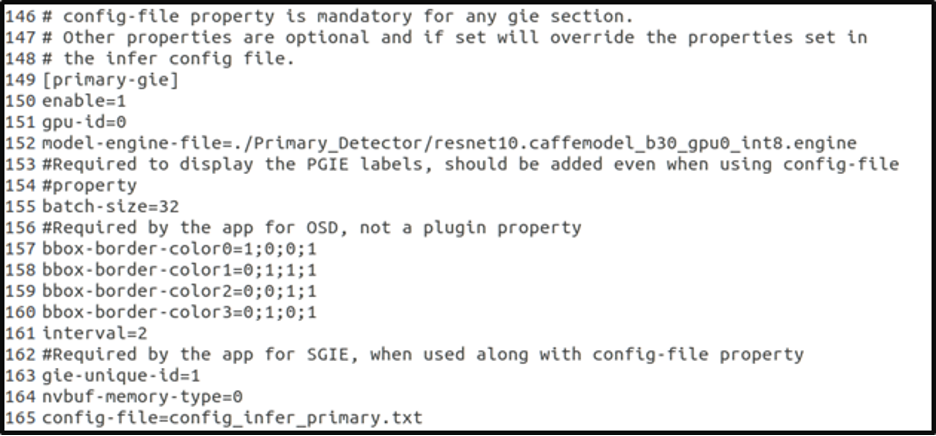
In [primary-gie] block, change model-engine-file path, batch-size value and interval value as the picture below.
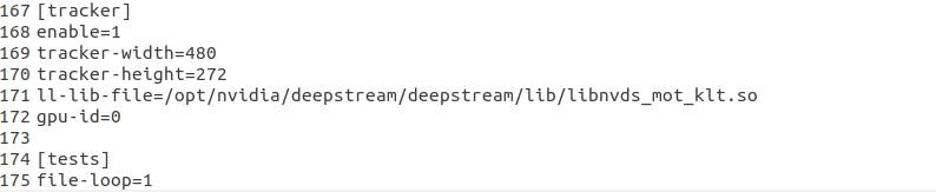
At the end of file, we add tracker and tests blocks.
Now, in the build folder, we can run in terminal with this script:
./deepstreamApp -c ../test_1080p_dec_infer-resnet_tiled_display_int8.txt
If you get an error like "-lgstrtspserver-1.0.so not found", you should type in terminal (if libgstrtspserver-1.0.so.0 exists)
sudo ln -s /usr/lib/aarch64-linux-gnu/libgstrtspserver-1.0.so.0 /usr/lib/aarch64-linux-gnu/libgstrtspserver-1.0.so
Add Logo on Your DeepStream Application
In our source files we need to change two files (deepstream_osd.h & deepstream_osd_bin.c) to add transparent logo on the centre of DeepStream window.
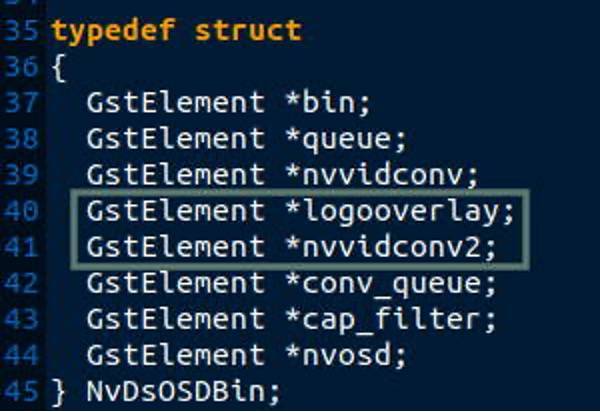
In deepstream_osd.h file, we need to add logooverlay & nvvidconv2 elements as the picture below.
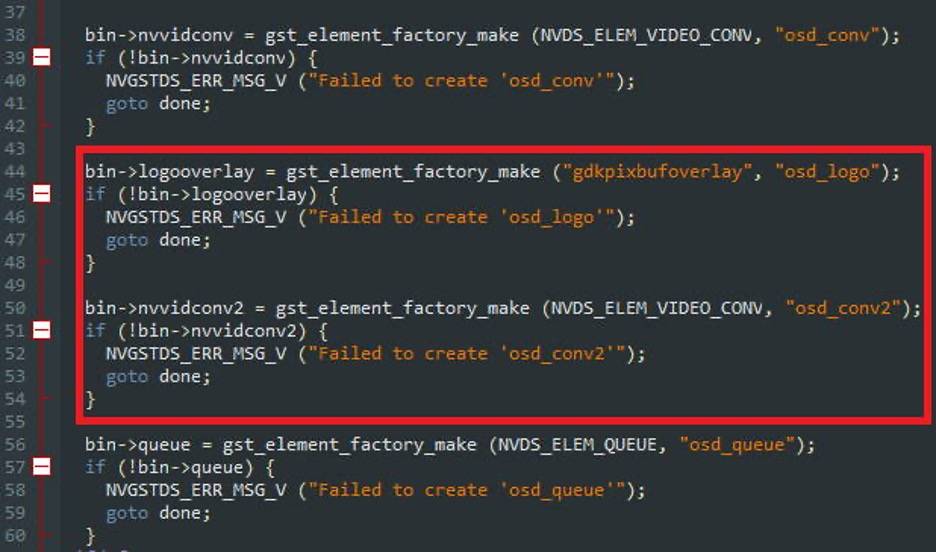
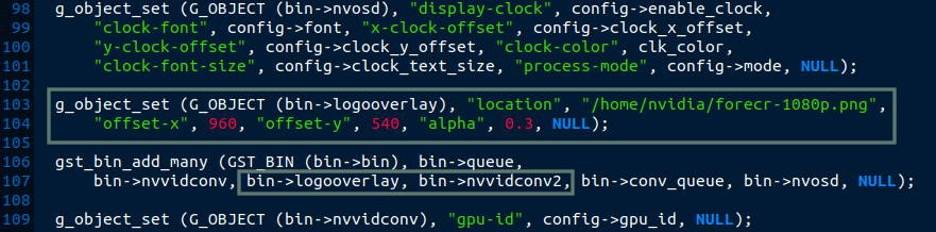
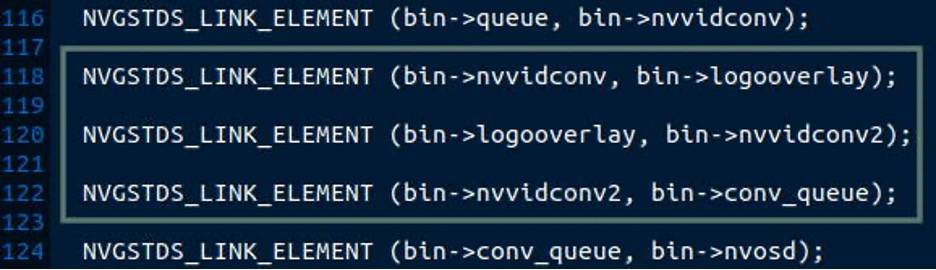
In deepstream_osd_bin.c file, we need to define logooverlay & nvvidconv2 elements in 3 places.
Add the framed structures in to the deepstream_osd_bin.c file as the picture below.
Add the framed structures in to the deepstream_osd_bin.c file as the picture below.
Add the framed structures in to the deepstream_osd_bin.c file as the picture below.
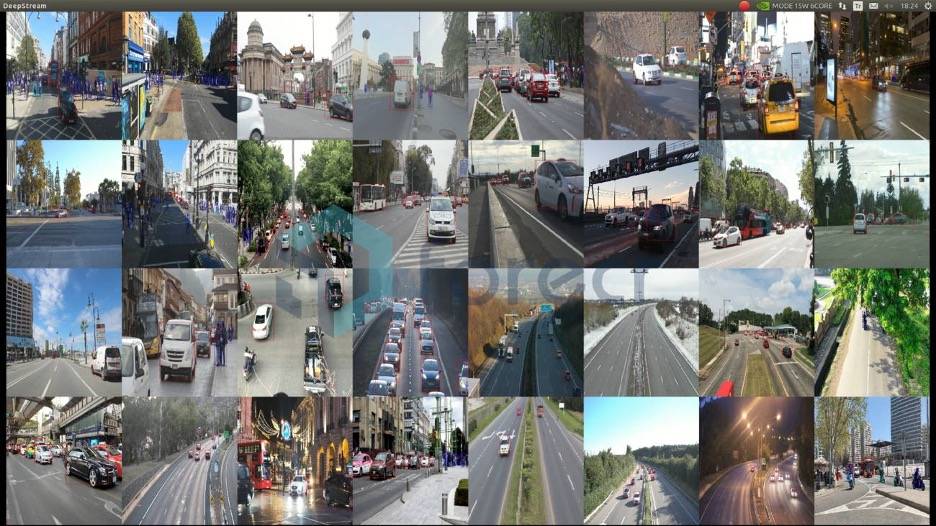
After that, re-compile your CMake project and run again.
./deepstreamApp -c ../test_1080p_dec_infer-resnet_tiled_display_int8.txt
Thank you for reading our blog post.