How to Clear The External Storage on Jetson Modules?
WHAT YOU WILL LEARN?
1- How to change the Filesystem Root to internal storage?
2- How to format the external storage?
ENVIRONMENT
Hardware: DSBOX-NX2
OS: Jetpack 4.6
In this guide we will change the Filesystem Root storage from external to internal storage (eMMC). Then, we will format the external storage.
Sometimes we need to re-flash (or upgrade) our Jetson modules. Using an external storage as Filesystem Root cause a few problems after doing it. We have to follow these steps below to avoid these problems.
This guide prepared for SSD mounted system but you can follow the same steps in your SD card mounted system.
Attention: If the Jetson module does not use its external storage as Filesystem Root, you don’t need to erase it.
Changing the Filesystem Root
If you have follow one of blog-posts below to transferring the Filesystem Root to your external storage, you can just modify the boot/extlinux/extlinux.conf files located on both storages.
• https://www.forecr.io/blogs/bsp-development/change-root-file-system-to-sd-card-directly
• https://www.forecr.io/blogs/bsp-development/change-root-file-system-to-m-2-ssd-directly
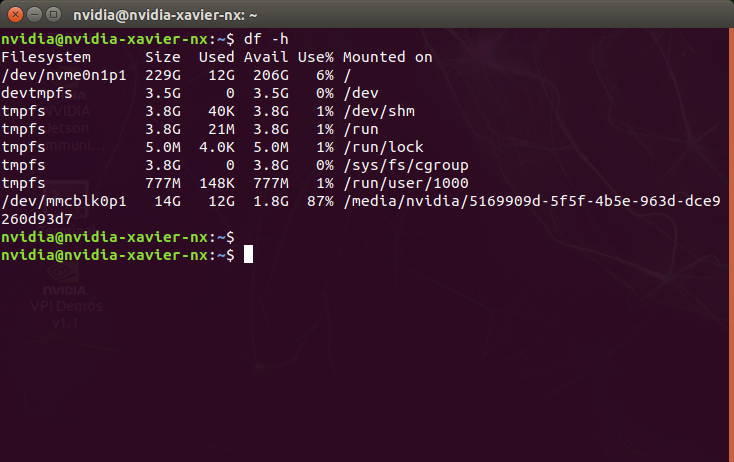
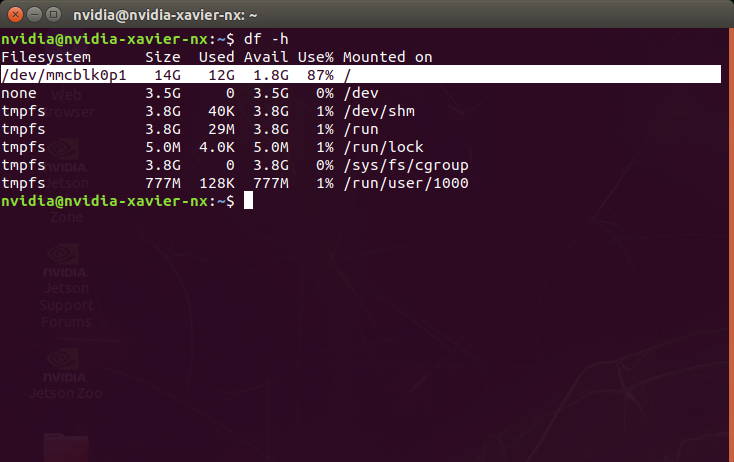
First, open a terminal on your Jetson. Then, type "df -h".
As you can see that our SSD connected on "/" (as Filesystem Root). If you are using an SD card, you should see “/dev/mmcblk1p1” device mounted as root (/).
At this point we need to change two extlinux.conf files which located on boot/extlinux folders both eMMC & SSD.
We started to modify the file at the SSD. Type this command to open it:
sudo gedit /boot/extlinux/extlinux.conf


As you can see that, the "root" parameter set as "/dev/nvme0n1p1". (If you are using an SD card, you should see “/dev/mmcblk1p1”). You need to change it as "/dev/mmcblk0p1".
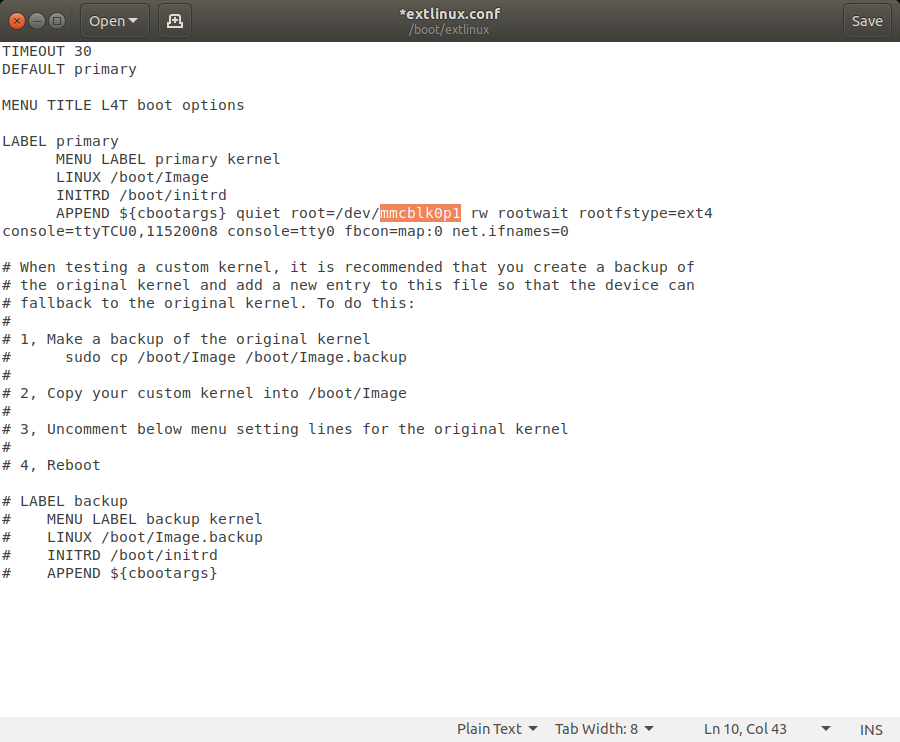
Then, save it and close.
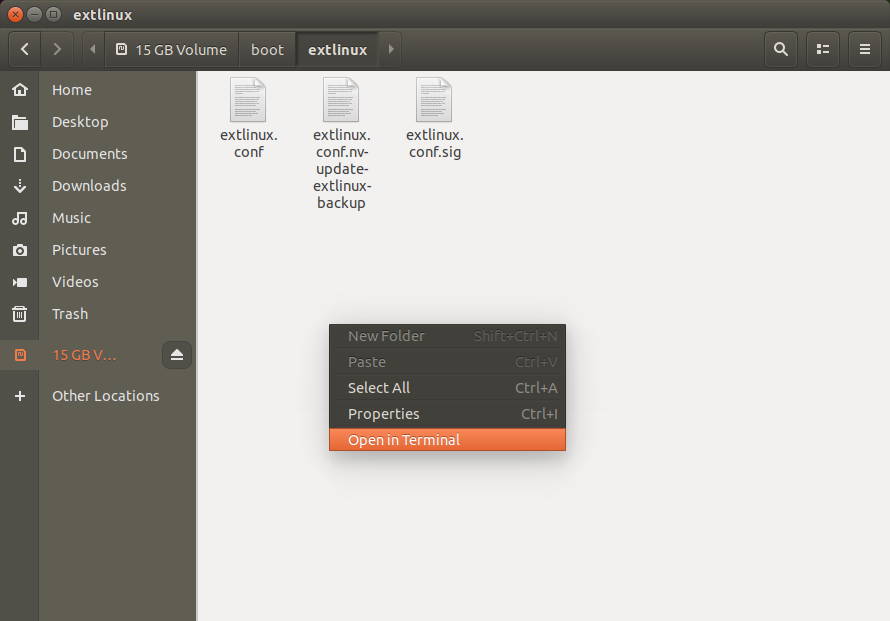
Open the File Manager and open your internal storage (eMMC).

Open the “boot/extlinux” folder & open a terminal from here.
Type this command below to modify the second extlinux.conf file:
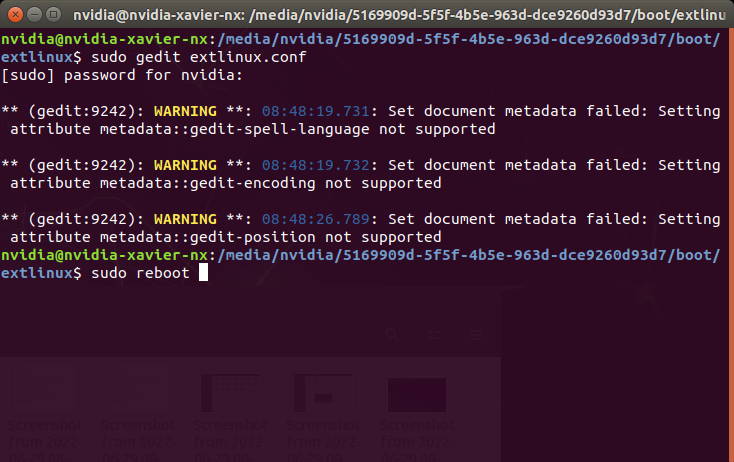
sudo gedit extlinux.conf


You need to do that the same update on this file as well (From "nvme0n1p1" to "mmcblk0p1") (If you are using an SD card, you should see “/dev/mmcblk1p1”).

Then, save it & close.
Type "sudo reboot" to the terminal for applying the differences.
After the system rebooted, type "df -h". As you can see that, the eMMC connected as root.
Formatting the External Storage
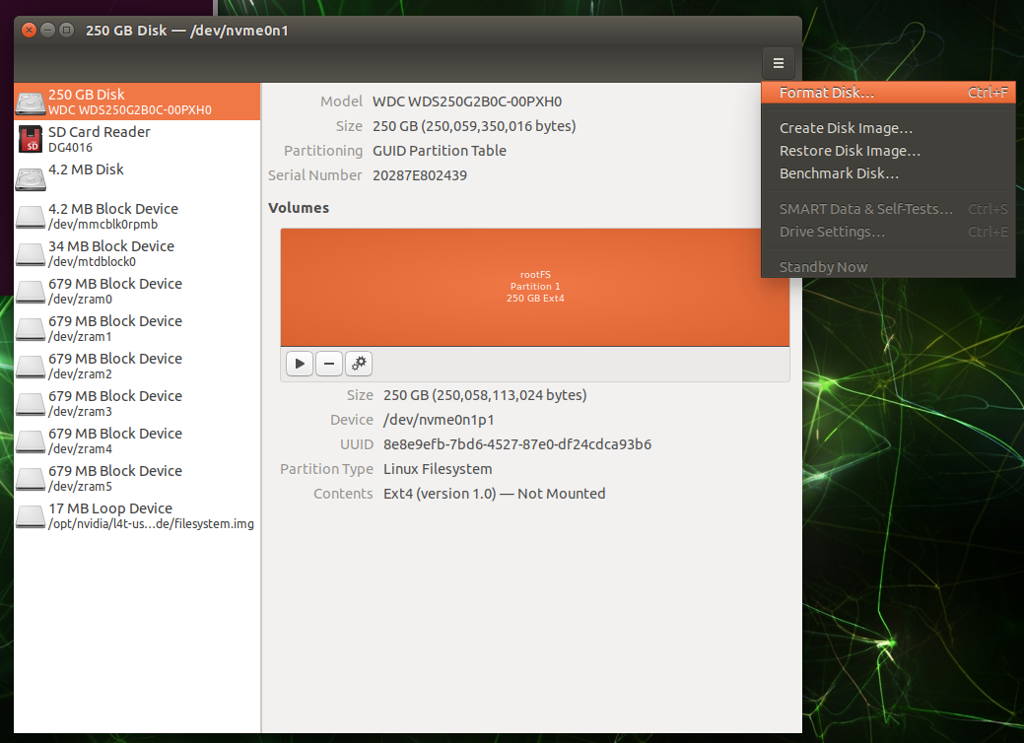
Now, open the "Disks" application (or type "gnome-disks" from terminal).
Select the SSD drive & format it.
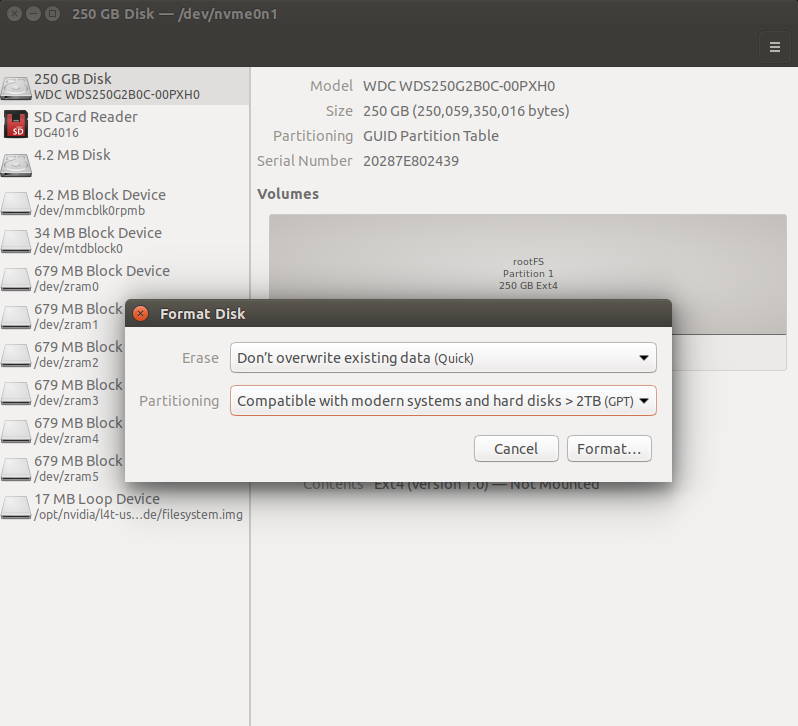
Then, select the default settings & click “Format”.
Then, accept the formatting step.
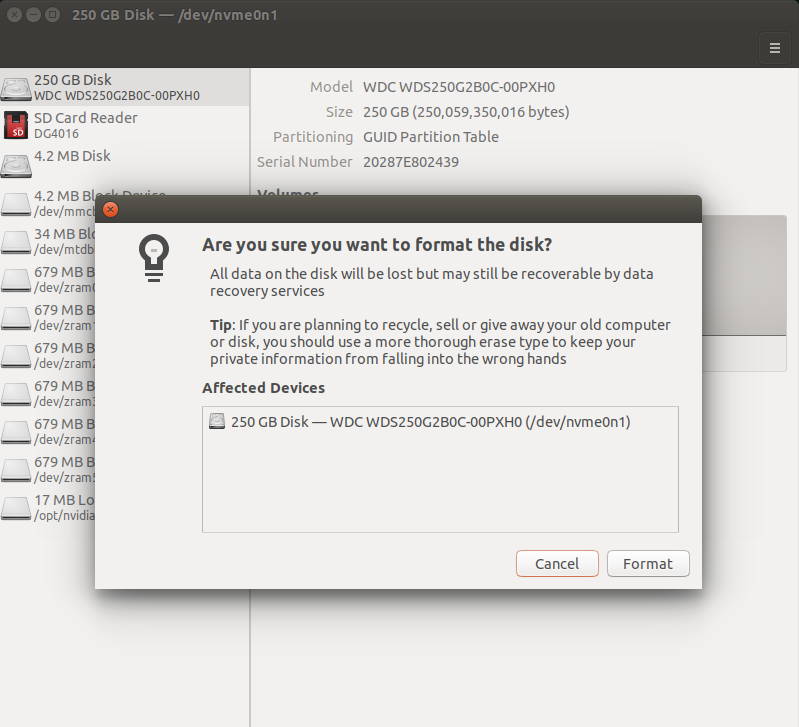
Type the current user’s password on it.

After a few seconds later, the external storage formatted successfully.

Thank you for reading our blog post.