How to Use Simcom SIM7906E-M2 LTE Module with DSBOARD-AGXMAX?
WHAT YOU WILL LEARN?
1- How to enable M.2 Key-B slot’s power?
2- How to connect the mobile broadband?
ENVIRONMENT
Hardware: DSBOARD-AGXMAX
OS: JetPack 5.1.4
In this blog post, we will connect mobile broadband with Simcom SIM7906E-M2 LTE GSM module. First, we will enable M.2 Key-B slot’s power. Then, we will connect to the Internet with this mobile broadband.
Hint: In this tutorial, we connected our GSM antennas on this module's MAIN & AUX ports.
Enabling M.2 Key-B Slot’s Power
Connect the Simcom SIM7906E-M2 LTE GSM module & SIM card on DSBOARD-AGXMAX. Then, power up the system.
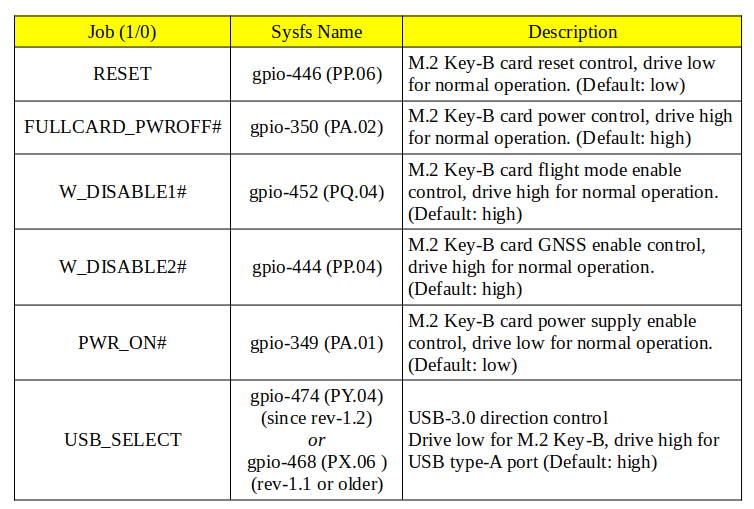
Here are the pin definitions of each GPIO:
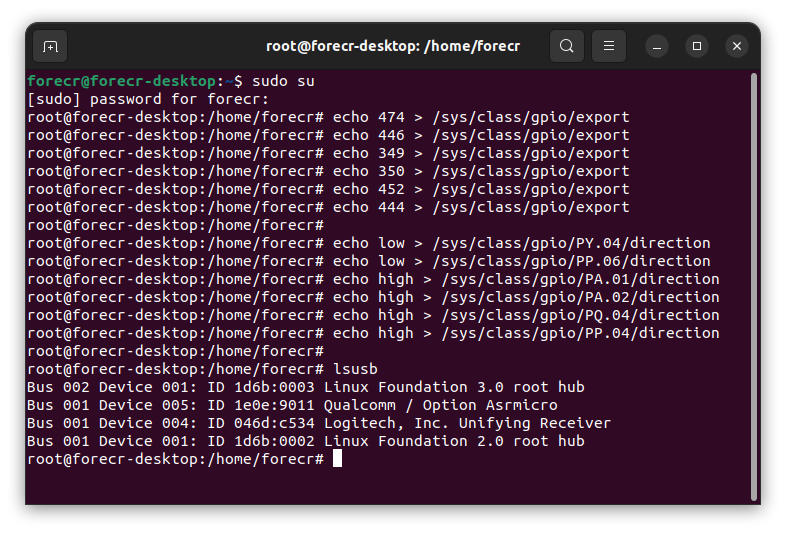
For JetPack-5, open a terminal and type these commands below (since rev-1.2):
sudo su
echo 474 > /sys/class/gpio/export
echo 446 > /sys/class/gpio/export
echo 349 > /sys/class/gpio/export
echo 350 > /sys/class/gpio/export
echo 452 > /sys/class/gpio/export
echo 444 > /sys/class/gpio/export

echo low > /sys/class/gpio/PY.04/direction
echo low > /sys/class/gpio/PP.06/direction
echo high > /sys/class/gpio/PA.01/direction
echo high > /sys/class/gpio/PA.02/direction
echo high > /sys/class/gpio/PQ.04/direction
echo high > /sys/class/gpio/PP.04/direction
If your board revision is rev-1.1 or older, use these commands below:
sudo su
echo 468 > /sys/class/gpio/export
echo 446 > /sys/class/gpio/export
echo 349 > /sys/class/gpio/export
echo 350 > /sys/class/gpio/export
echo 452 > /sys/class/gpio/export
echo 444 > /sys/class/gpio/export

echo low > /sys/class/gpio/PX.06/direction
echo low > /sys/class/gpio/PP.06/direction
echo high > /sys/class/gpio/PA.01/direction
echo high > /sys/class/gpio/PA.02/direction
echo high > /sys/class/gpio/PQ.04/direction
echo high > /sys/class/gpio/PP.04/direction
For JetPack-6, install gpiod package first:
sudo apt install -y gpiod
Then, open a terminal and type these commands below (since rev-1.2):
sudo su
gpioset --mode=signal `gpiofind "PY.04"`=0 &
PID_M2B_USB_SELECT=$!
gpioset --mode=signal `gpiofind "PP.06"`=0 &
PID_M2B_RESET=$!
gpioset --mode=signal `gpiofind "PA.01"`=1 &
PID_M2B_PWR_ON=$!
gpioset --mode=signal `gpiofind "PA.02"`=1 &
PID_M2B_FULLCARD_PWRON=$!
gpioset --mode=signal `gpiofind "PQ.04"`=1 &
PID_M2B_ENABLE1=$!
gpioset --mode=signal `gpiofind "PP.04"`=1 &
PID_M2B_ENABLE2=$!
If your board revision is rev-1.1 or older, use these commands below:
sudo su
gpioset --mode=signal `gpiofind "PX.06"`=0 &
PID_M2B_USB_SELECT=$!
gpioset --mode=signal `gpiofind "PP.06"`=0 &
PID_M2B_RESET=$!
gpioset --mode=signal `gpiofind "PA.01"`=1 &
PID_M2B_PWR_ON=$!
gpioset --mode=signal `gpiofind "PA.02"`=1 &
PID_M2B_FULLCARD_PWRON=$!
gpioset --mode=signal `gpiofind "PQ.04"`=1 &
PID_M2B_ENABLE1=$!
gpioset --mode=signal `gpiofind "PP.04"`=1 &
PID_M2B_ENABLE2=$!
Then, type “lsusb” after 10 seconds later to check the GSM module powered on.
Connecting to the Mobile Broadband
Open the "Settings" application and select the "Network" section.
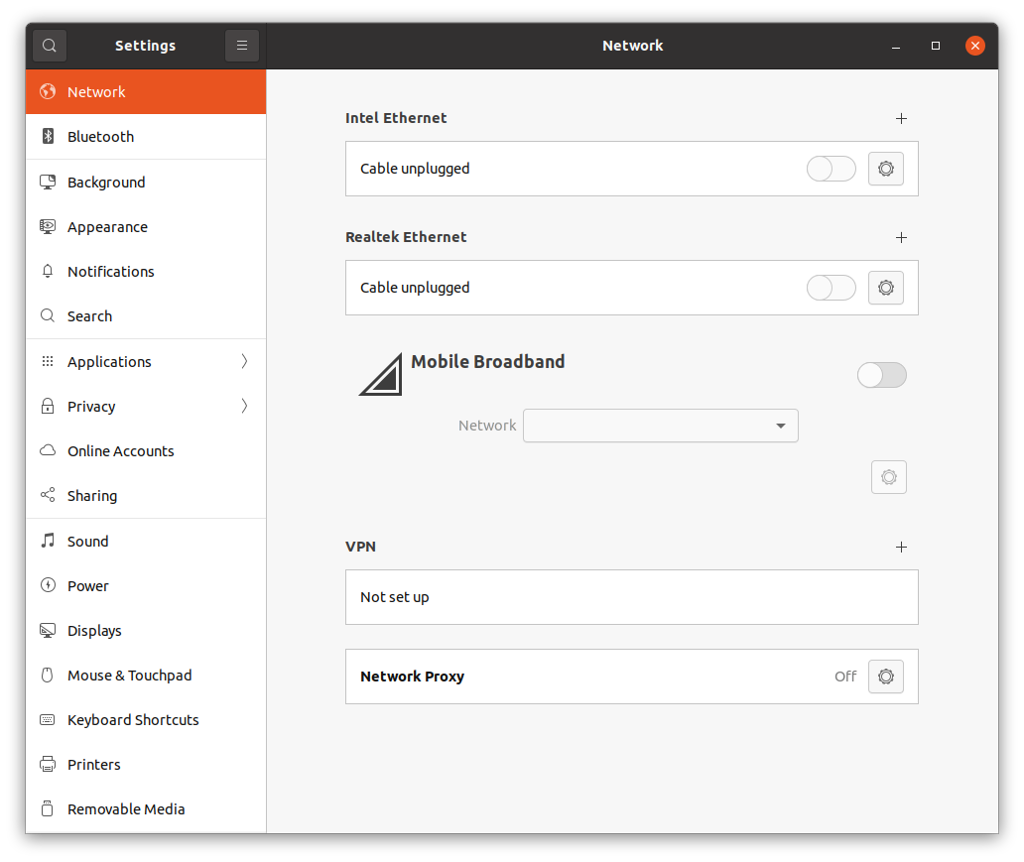
As you can see that the GSM module detected by the system.
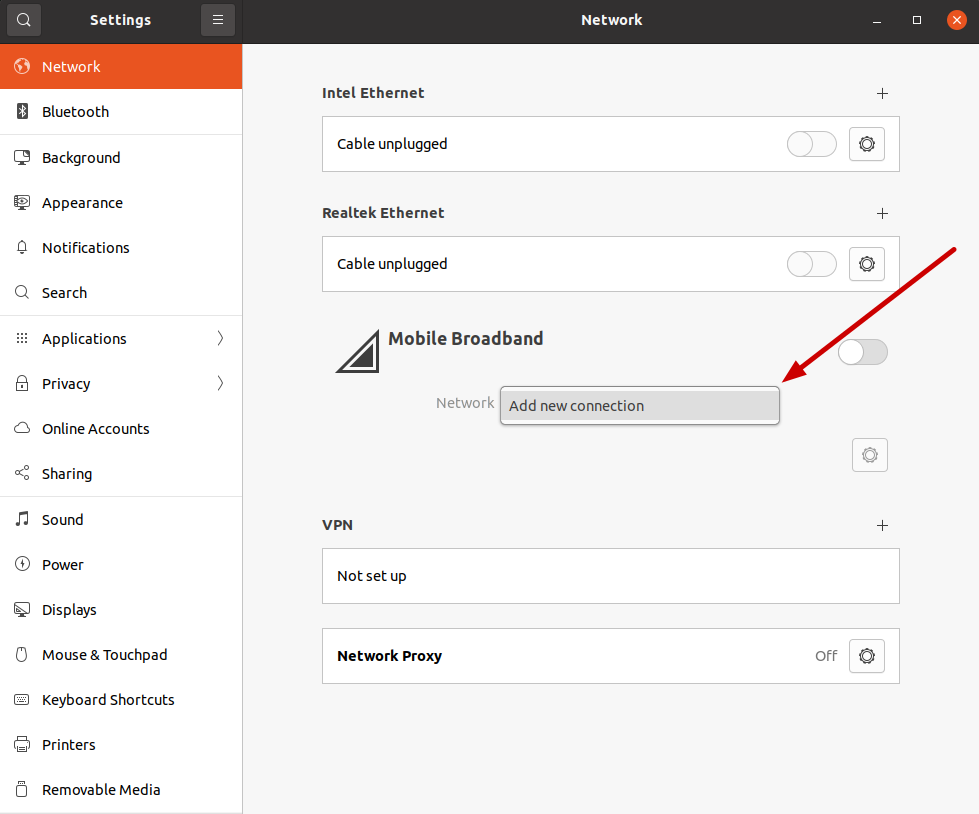
Select the "Network" side and click "Add new connection" (if you have not prepared it before).
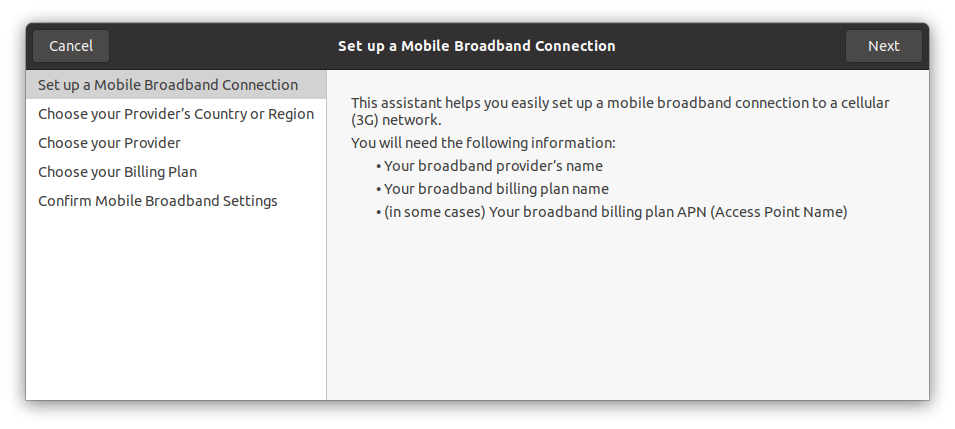
Click "Next" to configure the Mobile Broadband.
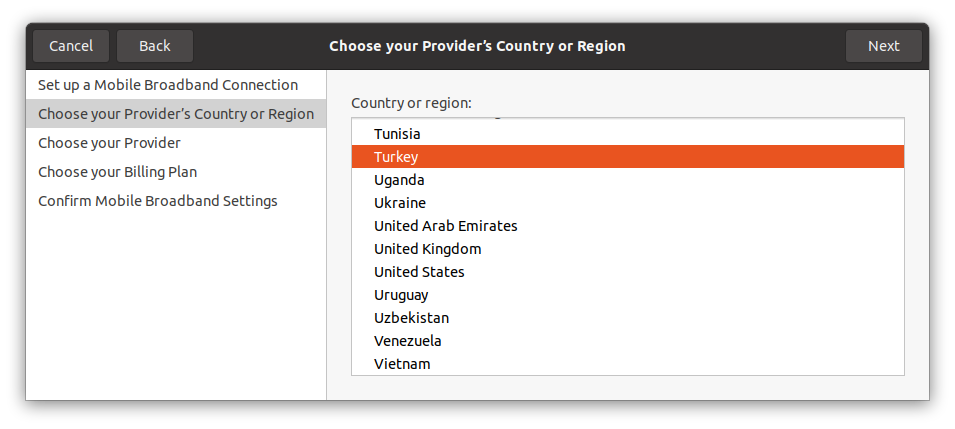
Select your country/region and continue.
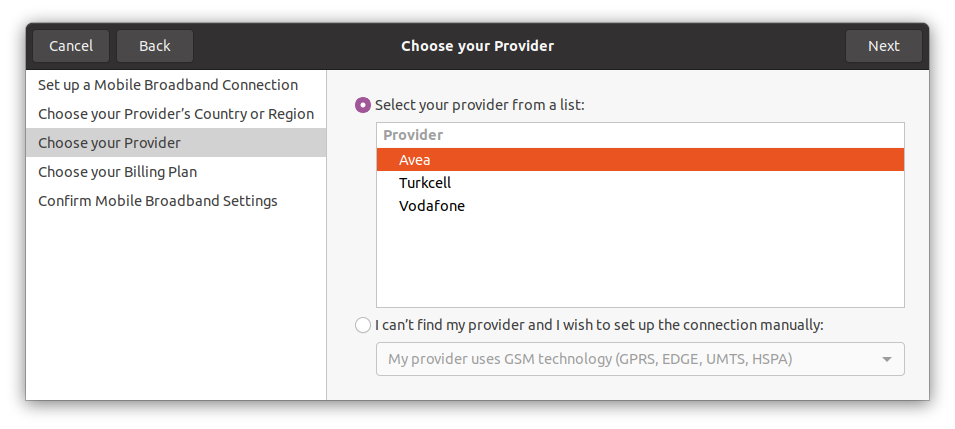
Select your provider and continue.
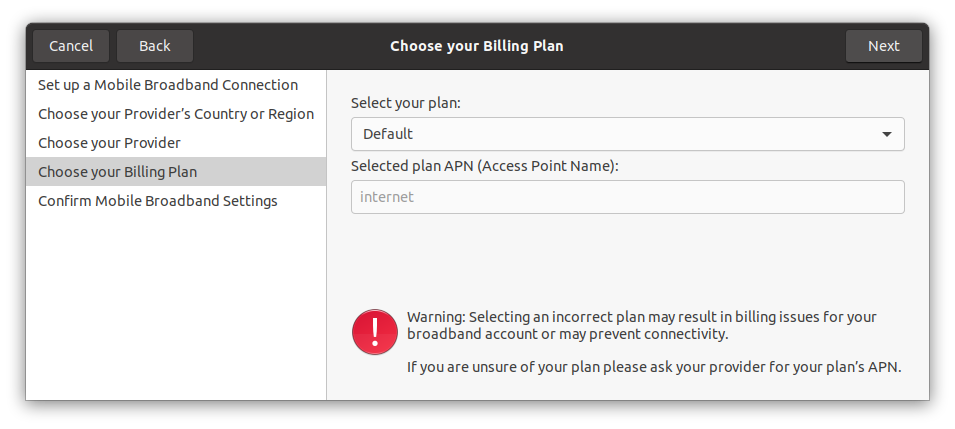
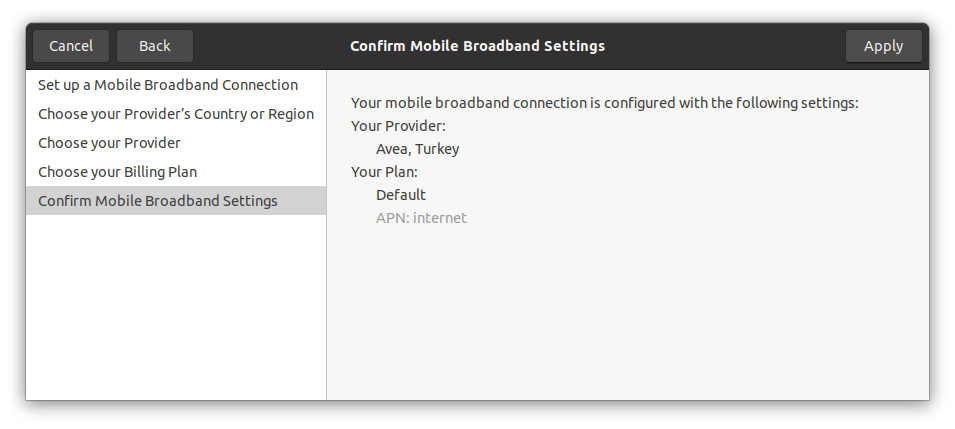
Select your billing plan and continue.
Look up the network configuration and apply it.
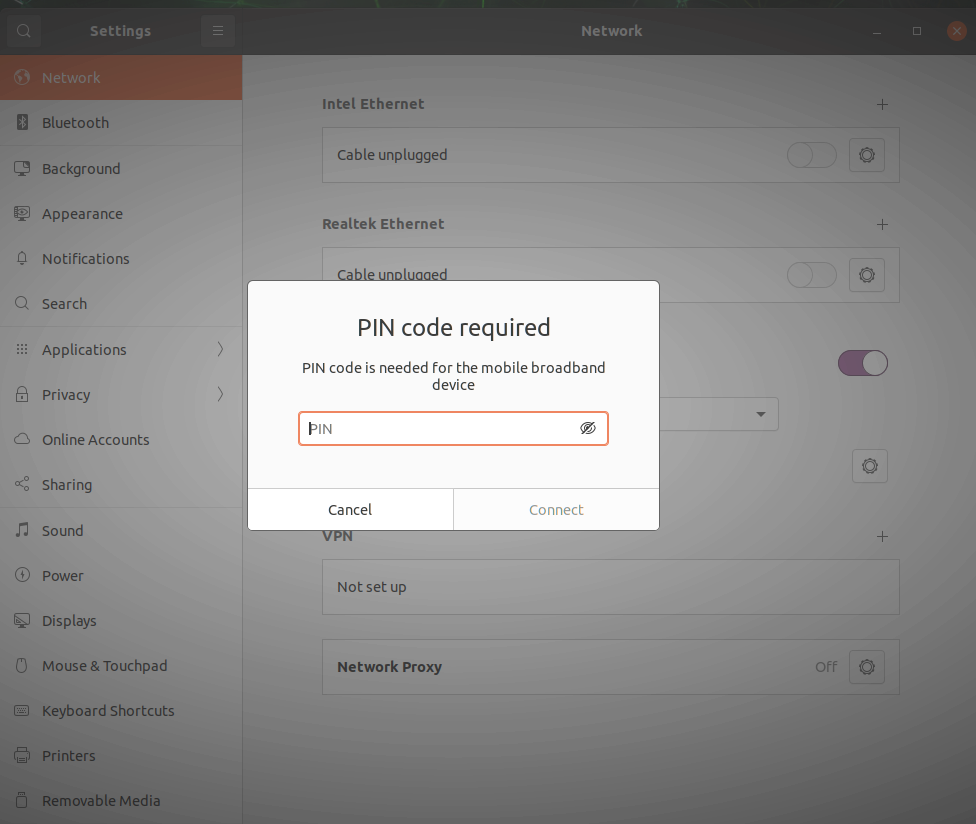
After the Mobile Broadband created, the PIN code will ask (if it has not disabled before).
Type the PIN code and unlock the SIM card.
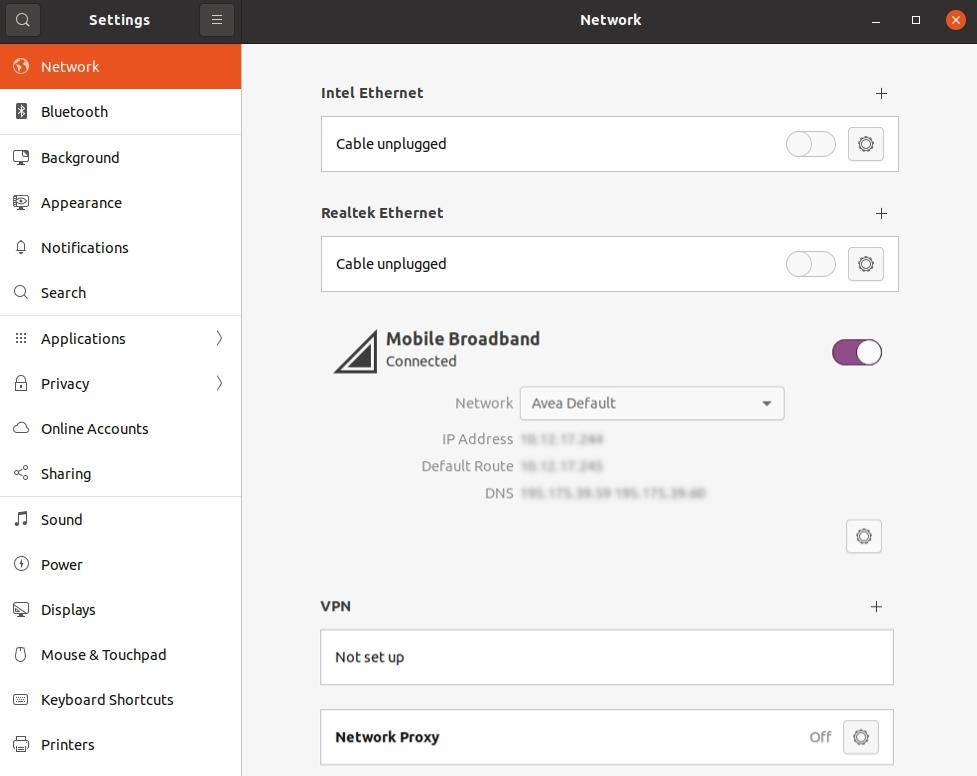
Then, the mobile broadband connection established.
Finally, let’s test it on terminal and browser.
Open a terminal and type the following command below:
ping -c 5 www.google.com
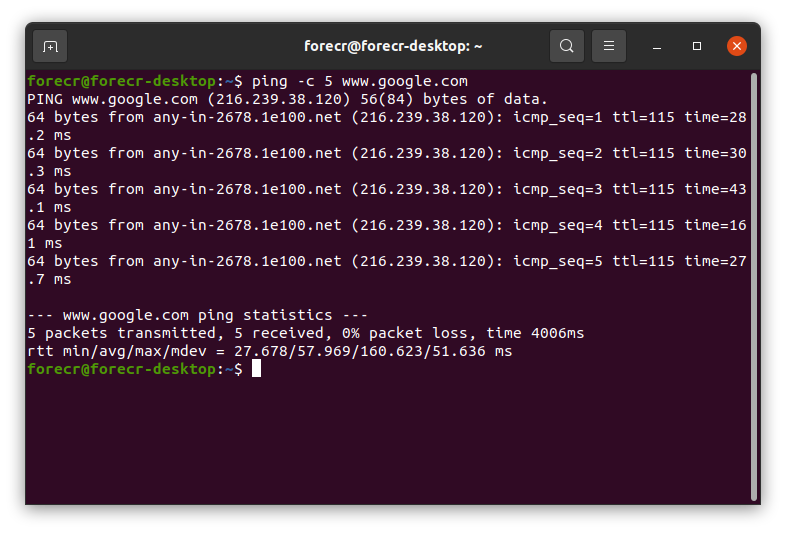
As you can see that the Internet connection is working.
Now, let's try to open our website to check it with browser.

Thank you for reading our blog post.