How to Use Basler MIPI CSI-2 Cameras Together with DSBOX-NX2?
WHAT YOU WILL LEARN?
1- How to install the Jetson OS with Basler camera BSP package?
2- How to install the Basler Camera Enablement Package?
3- How to test the connected Basler Camera?
ENVIRONMENT
Hardware: DSBOX-NX2
OS: Jetpack 4.6
In this blog post, we will install Basler Camera Enablement Package with our customized BSP package. First, we will install the Jeston OS with this customized BSP. Then, we will install the Basler Camera Enablement package. Finally, we will test the Basler daA4200-30mci camera with Pylon.
Jetson OS Installation with Basler Camera BSP Package
To begin with, log in to the NVIDIA SDK Manager on the host PC. Select the “Jetson Xavier NX” on the “Target Hardware” section and select the “JetPack 4.6” for “Target Operating System” (“Host Machine” components are not required). Continue to step 2.
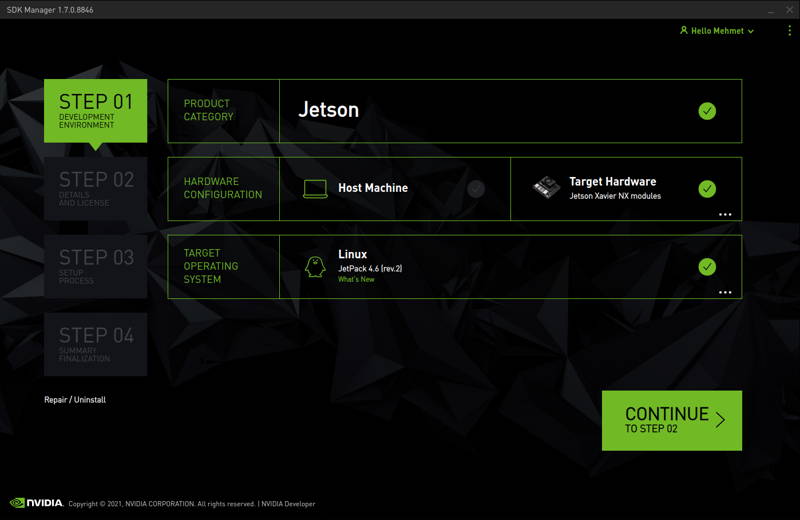
Select only “Jetson OS” in the Target Components, accept the licence agreement and continue to step 3.

Type your host PC’s password on it and click “OK”.

At the end of the OS creating step, the SDK Manager asks your Jetson module to install. Click “Skip” button to close it.

Click “Finish and Exit” button to close the SDK Manager.

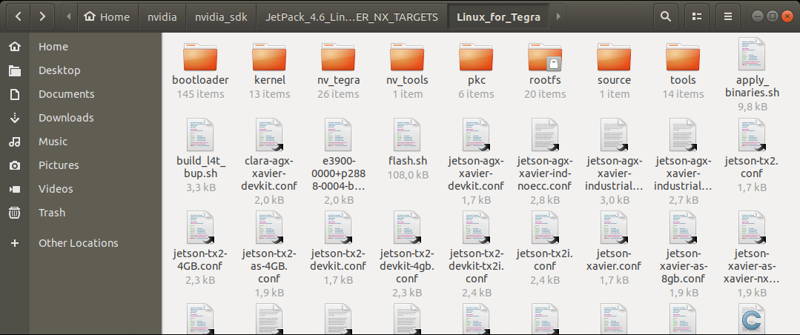
Open another file manager window and open the Jetson OS’s folder.
(All Jetson OSs located in the Target HW image folder (~/nvidia/nvidia_sdk/). You can find it on the 2nd step at SDK Manager.) Its located in: ~/nvidia/nvidia_sdk/JetPack_4.6_Linux_JETSON_XAVIER_NX_TARGETS/Linux_for_Tegra/
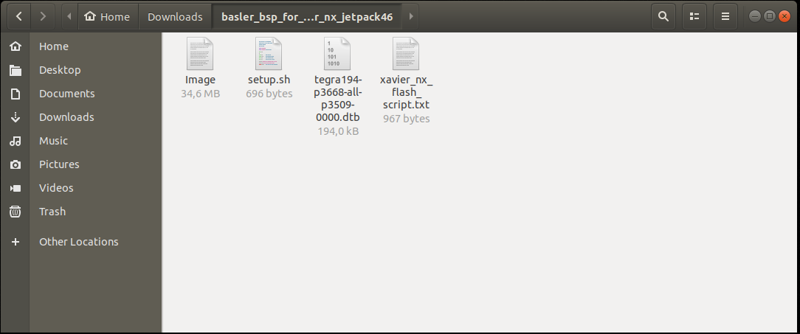
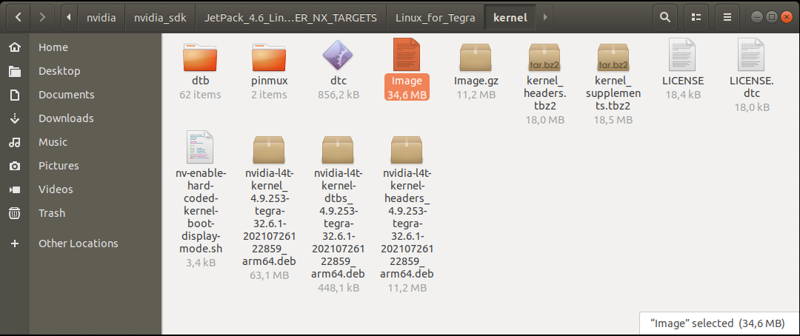
Copy the “Image” file into the “kernel” folder.
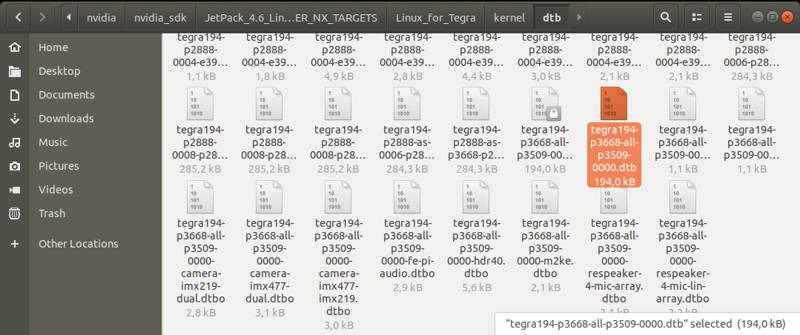
Copy the dtb file into the “kernel/dtb” folder.
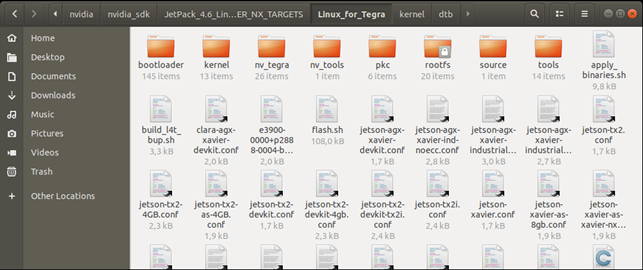
Return to the “Linux_for_Tegra” folder and open a terminal.
Type this command to create the Jetson image file:
sudo ./flash.sh --no-flash jetson-xavier-nx-devkit-emmc mmcblk0p1

At the end of the script, connect the power, HDMI, USB interfaces (keyboard & mouse) on the DSBOX-NX2. Connect the Recovery USB between DSBOX-NX2 to host PC and set the DSBOX-NX2 in recovery mode.
While the DSBOX-NX2's power connector plugged in,
• press power button then wait for boot led lights up.
• press reset & recovery buttons together
• release reset button
• release the recovery button after 3 seconds later. This will set it to Recovery mode.
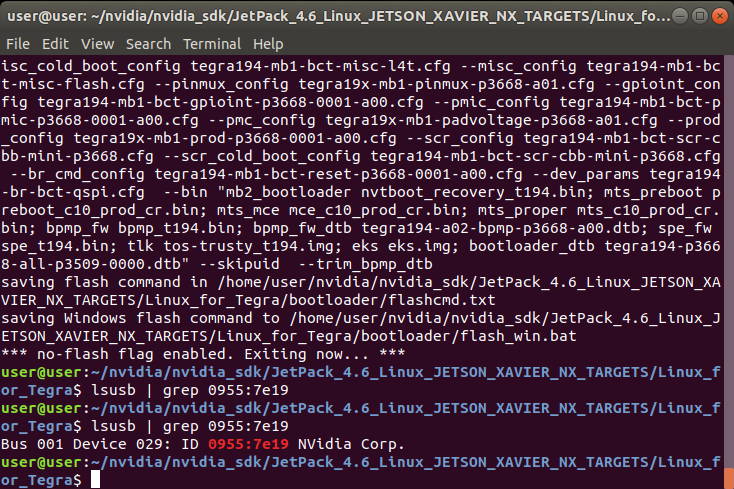
Check the DSBOX-NX2’s connection with this command:
lsusb | grep 0955:7e19
When a device named “NVidia Corp.” listed in this command’s result; it setted in Recovery mode and connected to host PC successfully.
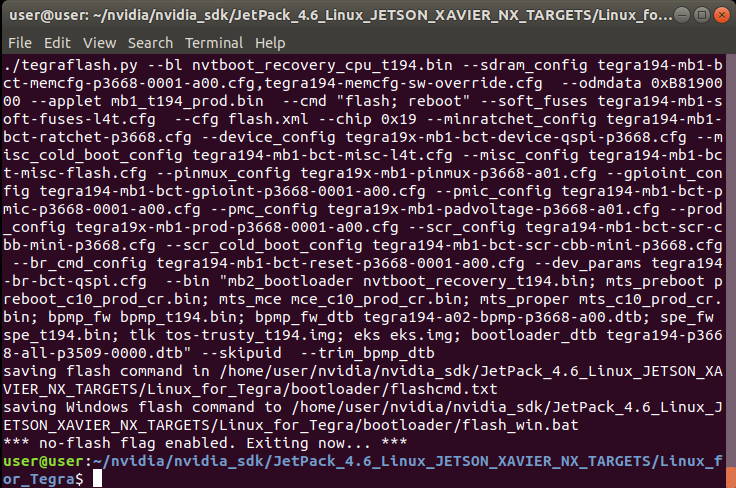
Then, type this command to flashing the Jetson module:
sudo ./flash.sh -r jetson-xavier-nx-devkit-emmc mmcblk0p1

A few seconds later...
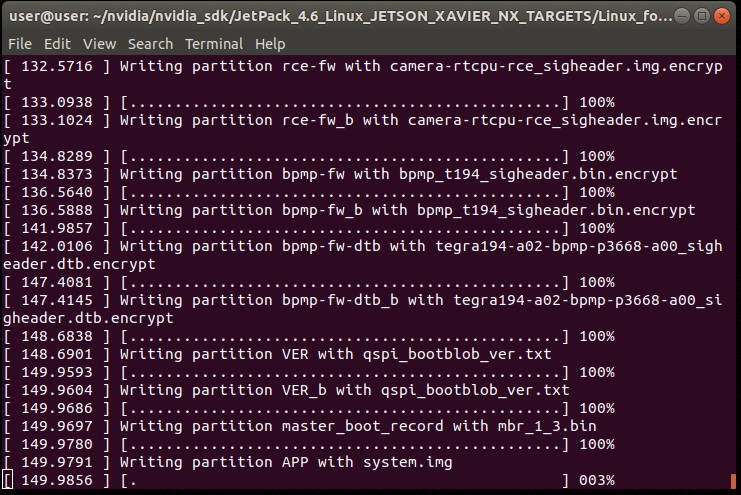
At the end of the flashing script, the Jetson module will reboot and the Ubuntu installation wizard opened on the HDMI connected monitor. Complete the installation on the Jetson side.

After completing the Ubuntu installation, it will reboot. After it rebooted, it’s ready to install the Basler Camera Enablement package.
Basler Camera Enablement Package Installation
On the Jetson module side, download the Basler Camera Enablement Package from here:

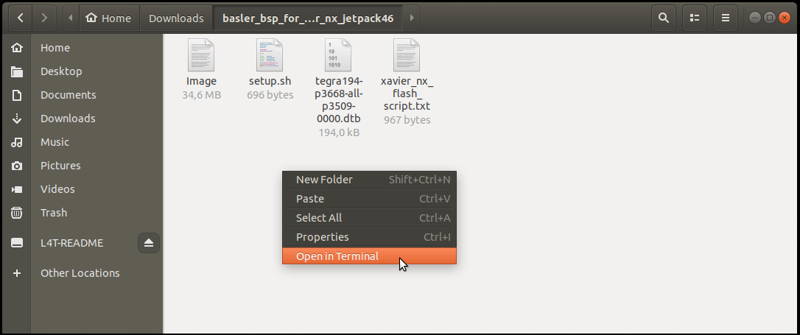
On the host PC side, open a terminal into the customized BSP package’s folder (It’s downloaded and extracted to the Jetson OS installation part).
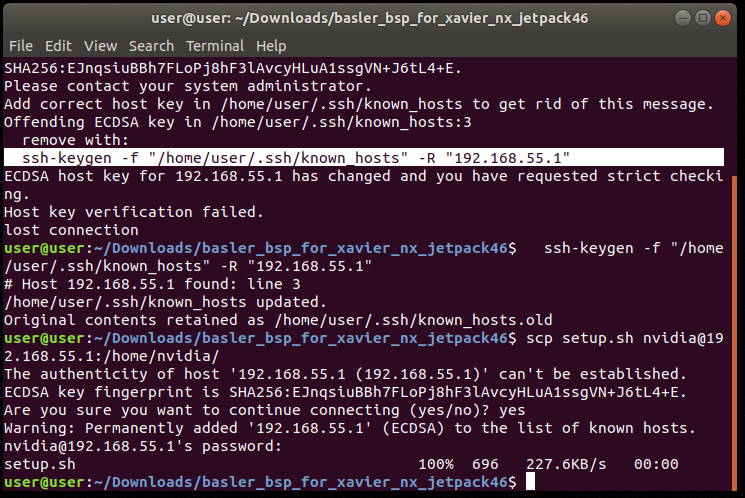
Copy the “setup.sh” file via Internet connection with this command (In this code, we copied the file to the “192.168.55.1” IP address which is created by the Recovery USB connection):
scp setup.sh nvidia@192.168.55.1:/home/nvidia/
If you typed another username (like: forecr) and the Recovery USB is not connected on the Jetson module, the copying script should like that (username: “forecr”; IP address: “192.168.1.43”):
scp setup.sh forecr@192.168.1.43:/home/forecr/

If you got this warning below, please type the command which started with “ssh-keygen” before copying the file.
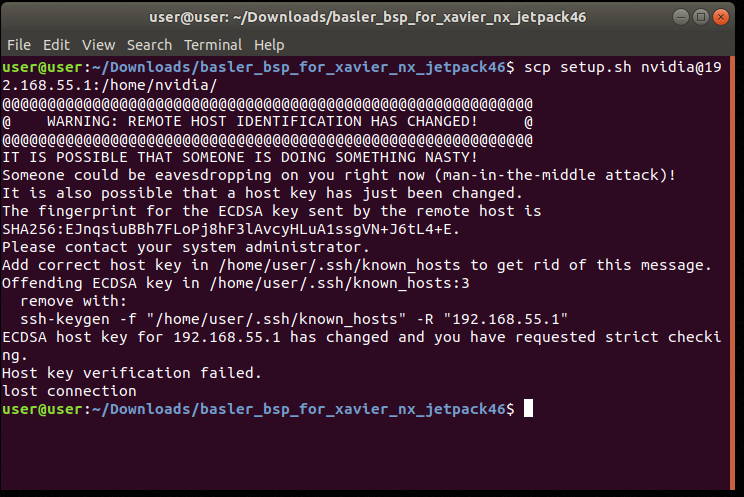
If you typed the “ssh-keygen” command, please retry to copy the “setup.sh” file.
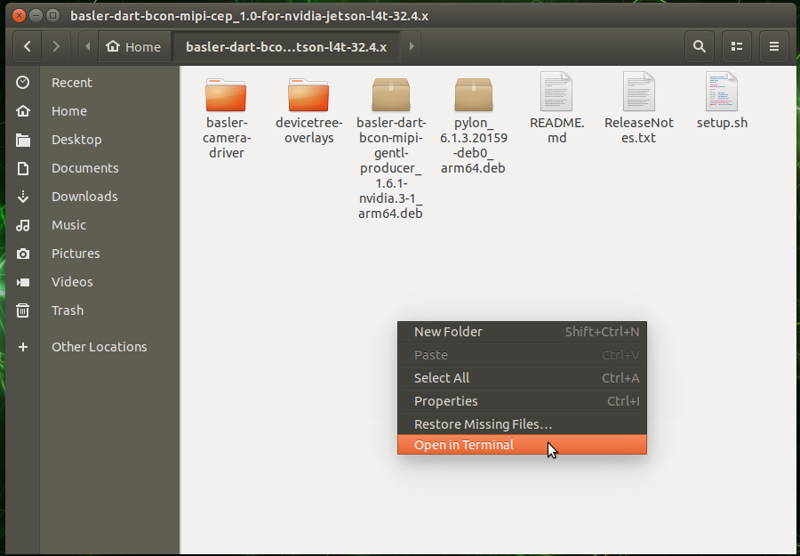
On the Jetson module side, extract the Basler package (basler-dart-bcon-mipi-cep_1.0-for-nvidia-jetson-l4t-32.4.x.tar.gz).

Copy the “setup.sh” file into the extracted folder.

Open a terminal into the extracted folder.
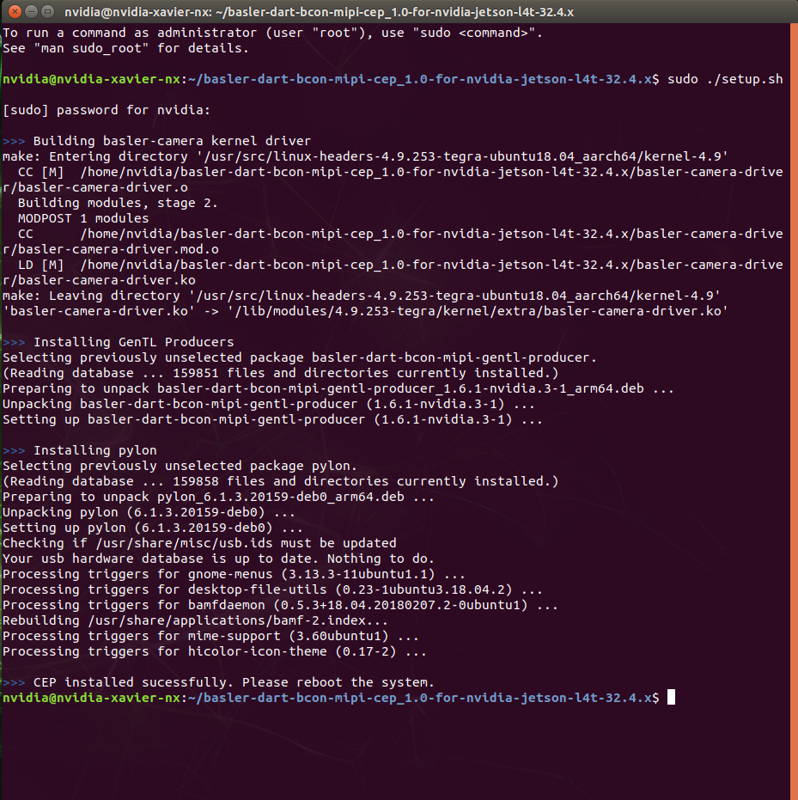
Type this command to install the Basler Camera’s drivers and Pylon:

Type this command to install the Basler Camera’s drivers and Pylon:
sudo ./setup.sh

At the end of the installation script, reboot the Jetson module.
After the Jetson module rebooted, it’s ready to testing with Basler camera.
Testing the Connected Basler Camera
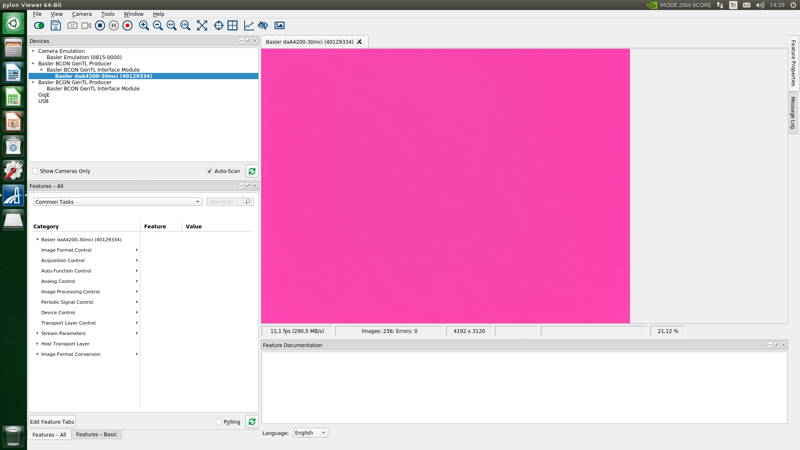
When the Jetson module powered off, you can connect the Basler camera (in this guide we used Basler daA4200-30mci CSI camera). After the camera connected, you can power on it.
After the system booted successfully, open the “Applications” menu and type “pylon”. The “pylon Viewer” should be seen on the results.
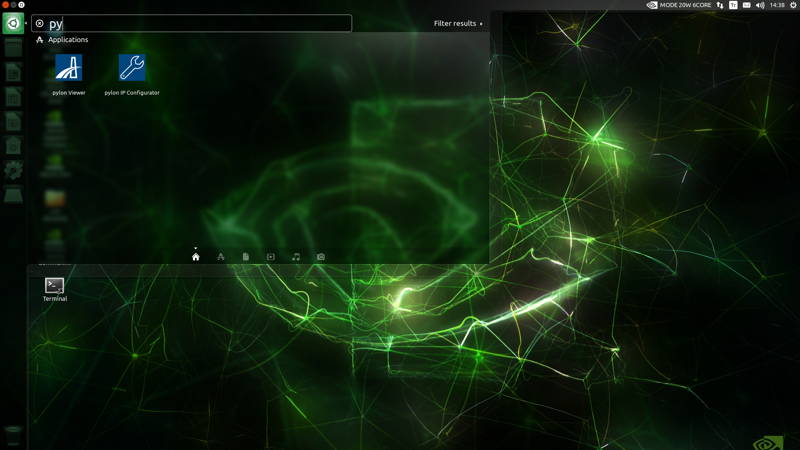
Open the “pylon Viewer”.
As you can see below, our camera (without lens connection) opened successfully and worked in ~11 FPS.