How to use Raspberry Pi V2 Camera with NVIDIA® Jetson™ Nano™ /Xavier™ NX Module?
WHAT YOU WILL LEARN?
1- Gstreamer pipeline for Raspberry Pi V2 Camera
2- Pipelines for using both CSI connectors
ENVIRONMENT
In this blog, we will explain how to use Raspberry Pi V2 Camera with NVIDIA Jetson Nano/Xavier NX module. We are going to use Gstreamer framework. There are two CSI sockets on our carrier board.
Gstreamer pipeline for Raspberry Pi V2 Camera
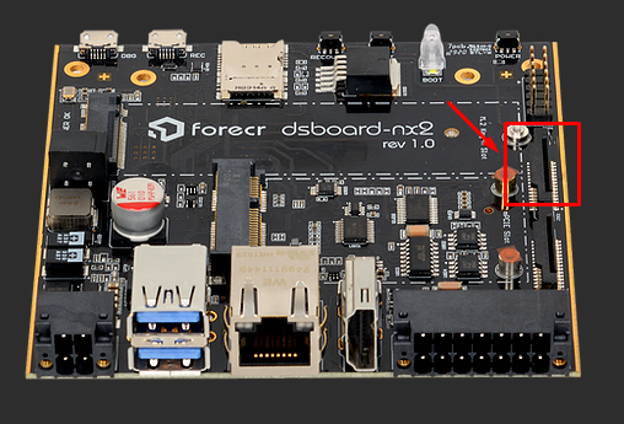
You can check the first CSI socket from below. For that CSI socket, "sensor_id=0" parameters should be used in pipeline.
You can simply use the Raspberry Pi V2 Camera with following pipeline.
gst-launch nvarguscamerasrc sensor_id=0 ! nvoverlaysink
If you would like to change width and height parameters, you can use this pipeline.
gst-launch-1.0 nvarguscamerasrc sensor_id=0 ! 'video/x-raw(memory:NVMM),width=3820, height=2464, framerate=21/1, format=NV12' ! nvvidconv flip-method=0 ! 'video/x-raw,width=960, height=616' ! nvvidconv ! nvegltransform ! nveglglessink -e
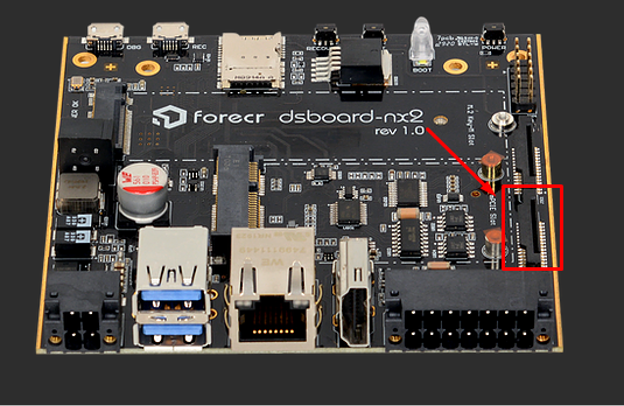
The second CSI scoket can be seen below.
Pipelines for using both CSI connectors
For another CSI socket, just changing sersor id number should be enough.
gst-launch nvarguscamerasrc sensor_id=1 ! nvoverlaysink
gst-launch-1.0 nvarguscamerasrc sensor_id=1 ! 'video/x-raw(memory:NVMM),width=3820, height=2464, framerate=21/1, format=NV12' ! nvvidconv flip-method=0 ! 'video/x-raw,width=960, height=616' ! nvvidconv ! nvegltransform ! nveglglessink -e
Thank you for reading our blog post.