Generate First Image for DSBOX-NX
WHAT YOU WILL LEARN?
ENVIRONMENT
Hardware: DSBOX-NX
OS: Ubuntu 18.04 LTS
Language: Bash
In this blog post, we will generate and install our first image with NVIDIA SDK Manager. We use our fanless industrial box PC, Forecr's DSBOX-NX in order to show you how to install JetPack pn Jetson Xavier NX and If you don't have installed SDK Manager, you can check out our Download and Install NVIDIA SDK Manager blog post.
Installing JetPack on Jetson Xavier NX
To start SDK Manager, you can simply run it via terminal.

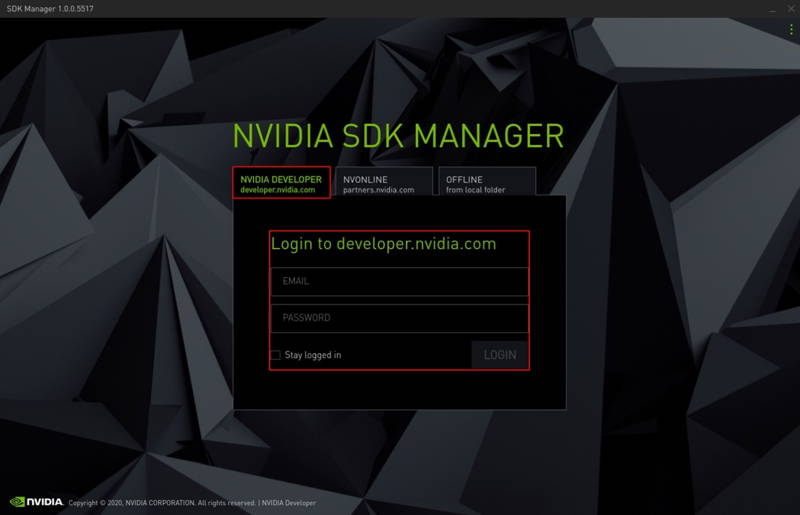
After the program starts you have to login with your NVIDIA Developer Account on NVIDIA DEVELOPER tab.
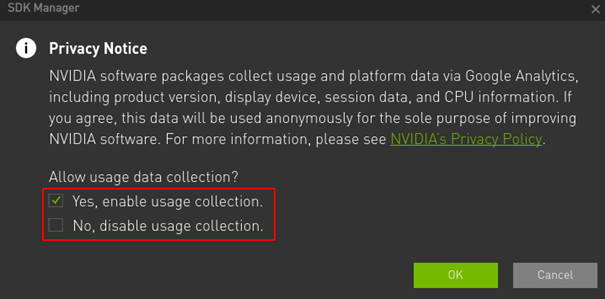
If it asks about send your future data usage to NVIDIA for improve application, it is up to you.
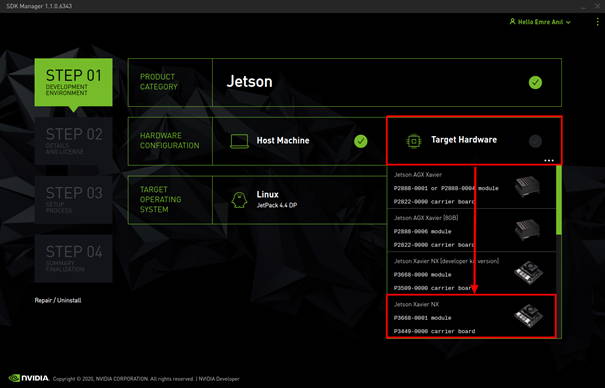
After pressing OK, you can see ui with step based tabs. On first step you have to select Target Hardware as "Jetson Xavier NX".
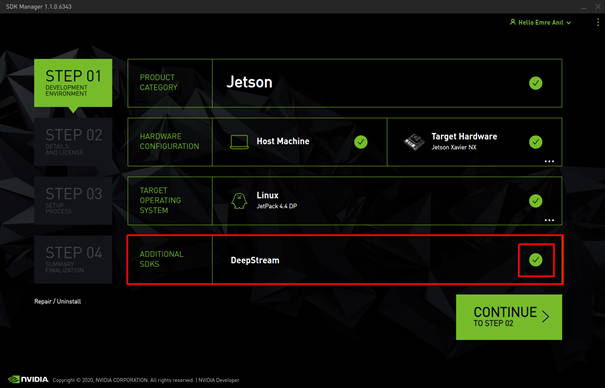
After selecting, new option "ADDITIONAL SDKS" will show up. If you want to use DeepStream on your projects, you should select it or you can install it later on DSBOX-NX.
Installing Jetson SDK Components
In the second step, you can see components which will be processed. If you want, you can select or deselect some components like Jetson OS and Jetson SDK but for the first image we recommend to select both of them.
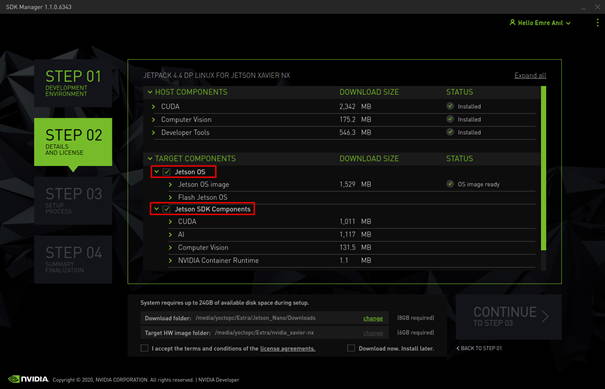
Below you can change, download and deployment folders. Accept license agreement and continue.

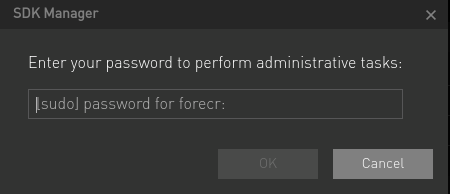
Enter your Ubuntu user password and press OK.
Program starts to download and install packages; this could take a while depending on your host PC and network performance.
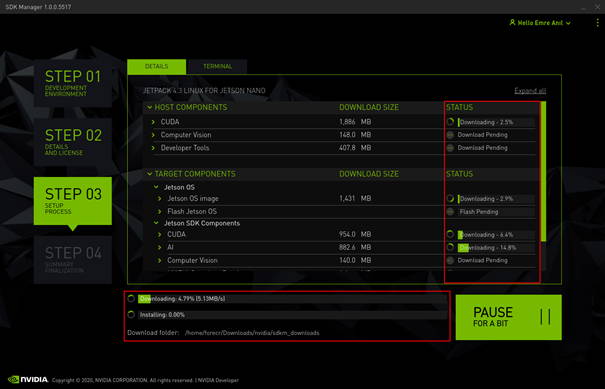
Meanwhile connect your DSBOX-NX to PC and start it on recovery mode. If you don't know how to start your DSBOX-NX on recovery mode check out our Out of Box blog post. You can always check whether your DSBOX-NX works on recovery mode or not with "lsusb" command.

If "about to flash" pop-up show up, re-check your connection with DSBOX-NX which you have done on the previous step then select "Manual Setup" and continue.
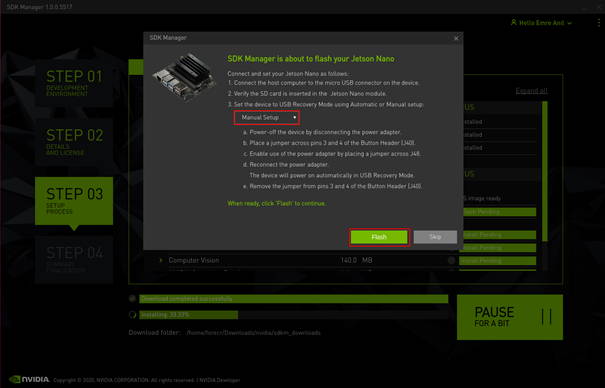
After "install SDK components" pop-up shows, connect your DSBOX-NX to monitor with HDMI or mini-DP cable then press reset button of the DSBOX-NX. Complete Ubuntu installation with using keyboard or mouse.
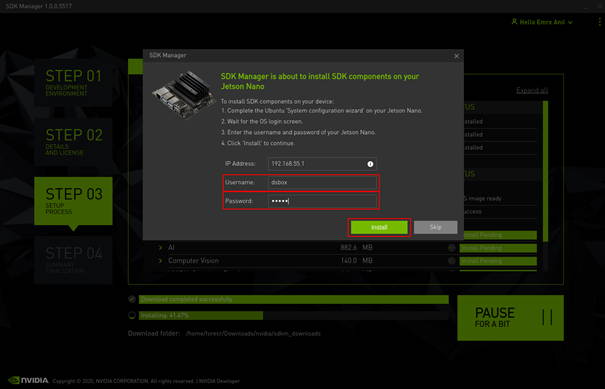
Then Ubuntu desktop shows up, you can continue on SDK Manager. Enter your username and password which you use while Ubuntu installation then press "Install".
Updating the device tree file
End of the installation you can exit from SDK Manager. Last step is change default deviceTree file with DSBox-NX one. To do this download our pre-compiled .dtb file and copy it inside kernel/dtb path under "Target HW Image Folder" (which selected before in sdkmanager).
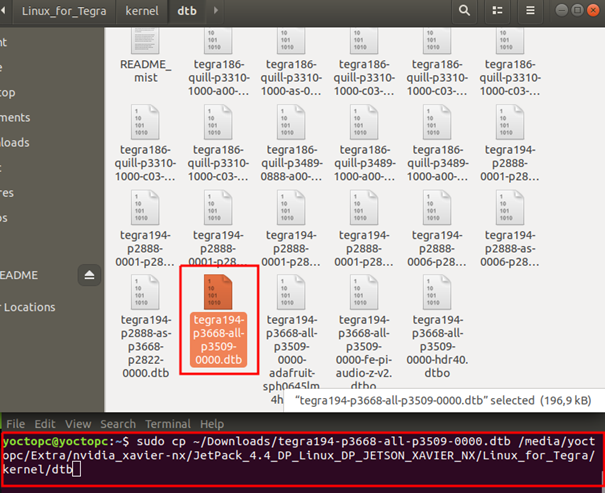
Then restart DsBOX-NX on recovery mode and use "flash.sh" script in "Target HW Image Folder".

If you need extra changes on BSP files, you can check out our DSBox Kernel & DeviceTree Development blog post.
Thank you for reading our blog post.


