Headless Installation for Jetson Xavier NX
ENVIRONMENT
Hardware: DSBOX-NX2
Host OS 1: Ubuntu 18.04
Host OS 2: Windows 10
In this blog post, we will explain how to make a headless installation using Ethernet on Jetson Xavier NX after installing the Jetson OS. To learn how to install Jetson OS using SDK manager, click here. In the linked page, follow the first two steps ("Including the Image and DTB file in Jetson OS Image" & "Installing the Jetson OS") on it and return to this guide.
How to Make Headless Installation for Jetson Xavier NX on Ubuntu Host?
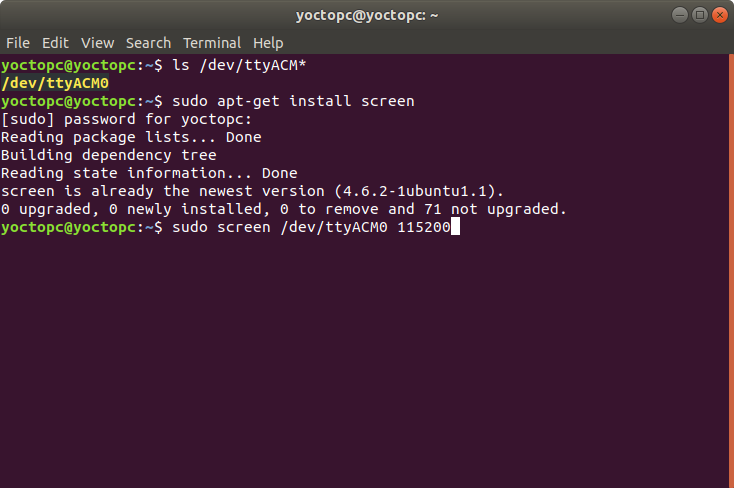
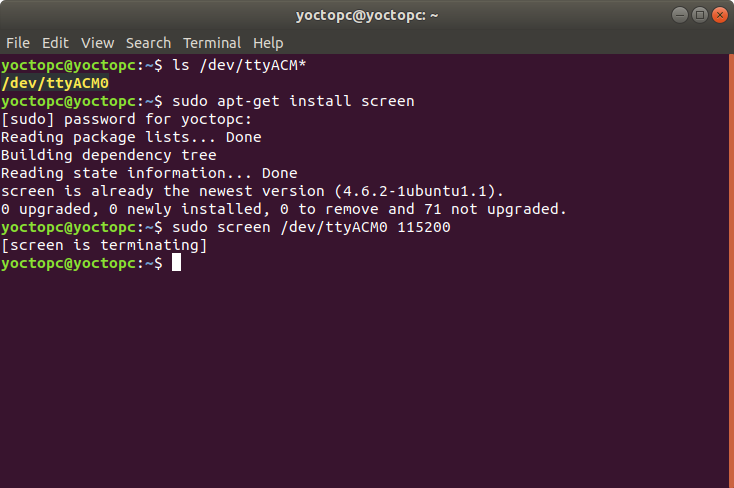
When you connect your Jetson Xavier NX to a host computer with microUSB cable, it appears as ACM*, * as 0 ,1, 2, etc. You can check the port name by the following command.
ls /dev/ttyACM*

Now, you need to install a serial terminal application like “screen” to serially transfer data to the Jetson Xavier NX.
sudo apt-get install screen
Then, connect to the Jetson Xavier NX using “screen” by specifying its port name (/dev/ttyACM0) and speed (115200).
sudo screen /dev/ttyACM0 115200
System configuration will start at the serial terminal as follows. If it doesn’t, press Enter to continue.
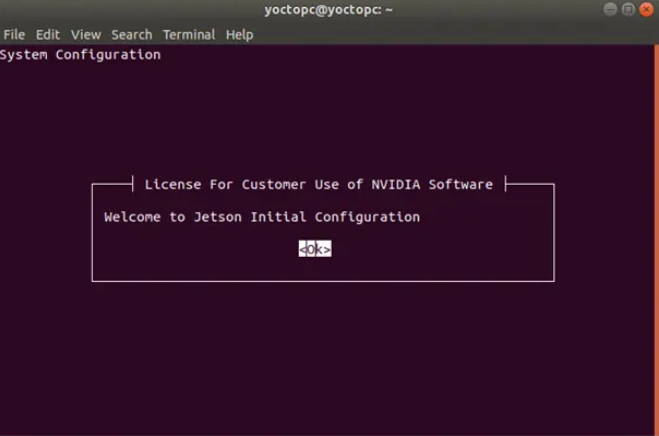
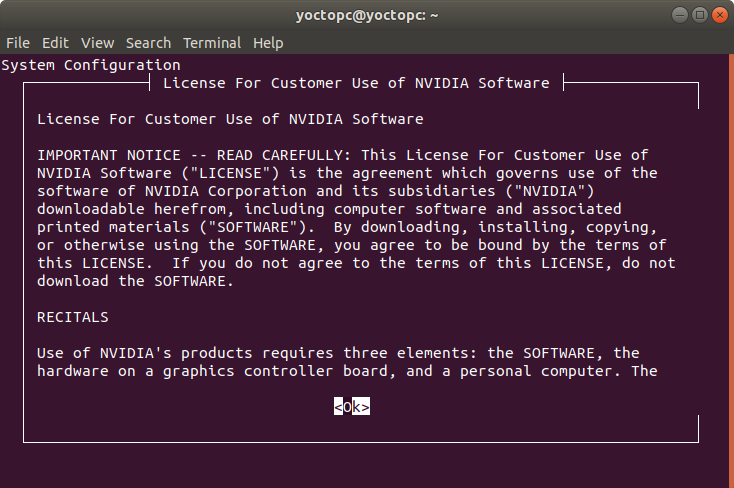
Press Tab then Enter keys one-by-one to accept the License Agreement.
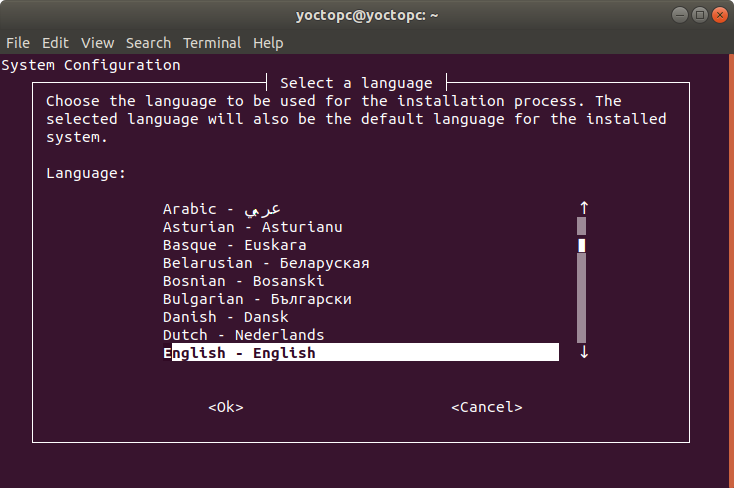
Choose a Language, then press Enter.
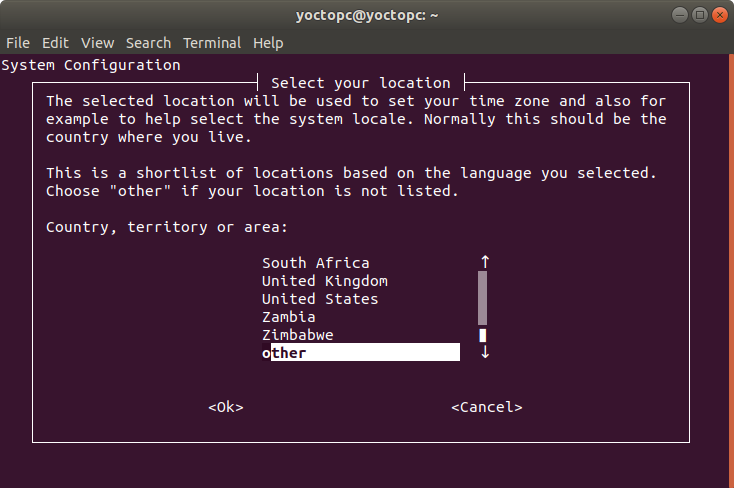
Choose a country. If your country is not in the list, choose other option. Then, press Enter to continue.

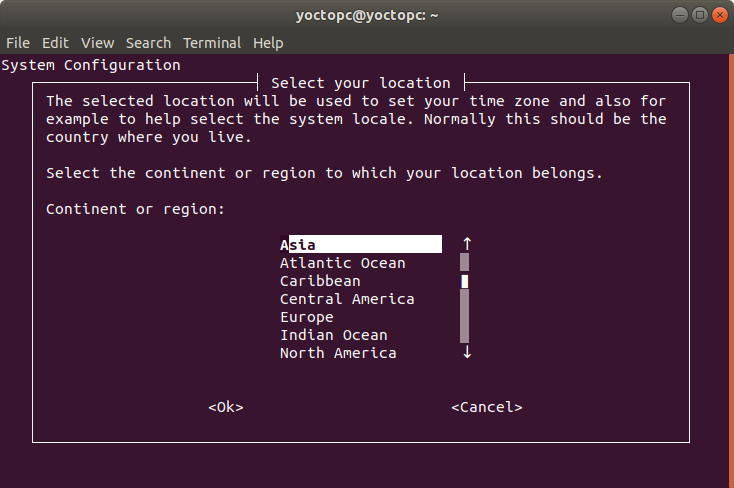
If you chose “other” as the country, choose your continent/region. Then, press Enter to continue.
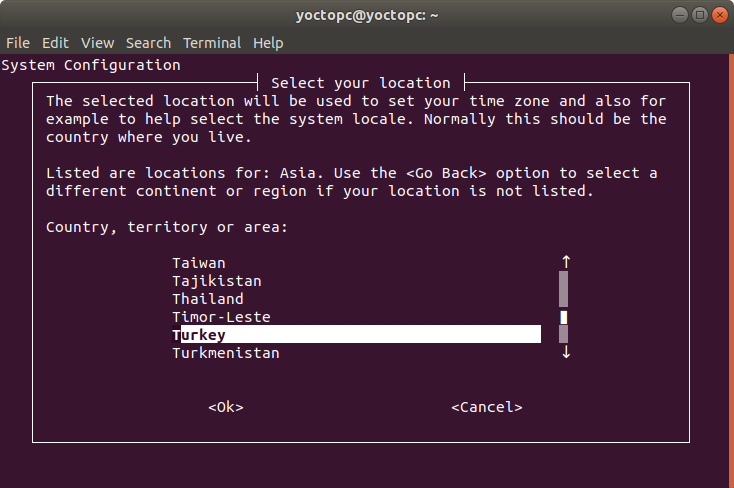
If you chose “other” as the country, select your country. Then, press Enter to continue.
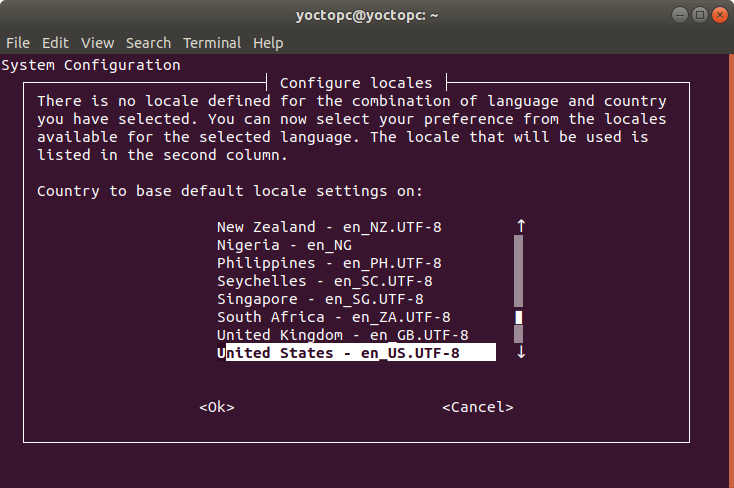
If your country is not defined in the system, you will see the following. Choose a locale of language. Then, press Enter to continue.
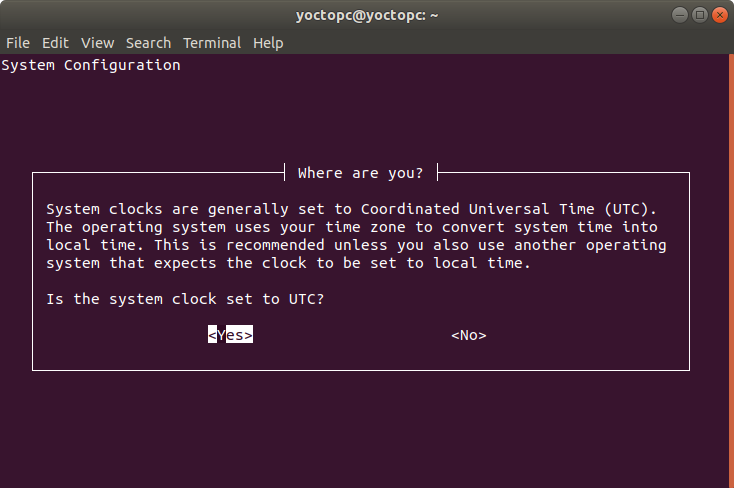
Choose Yes if you want to use the time as UTC. Choose No if you want to set your own time zone.
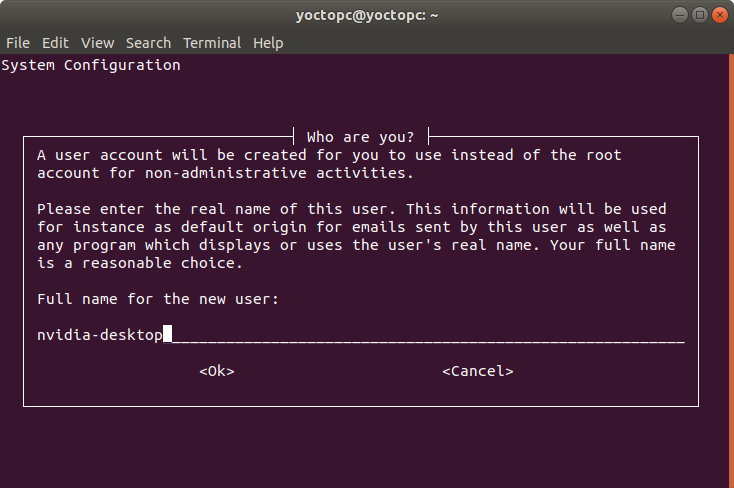
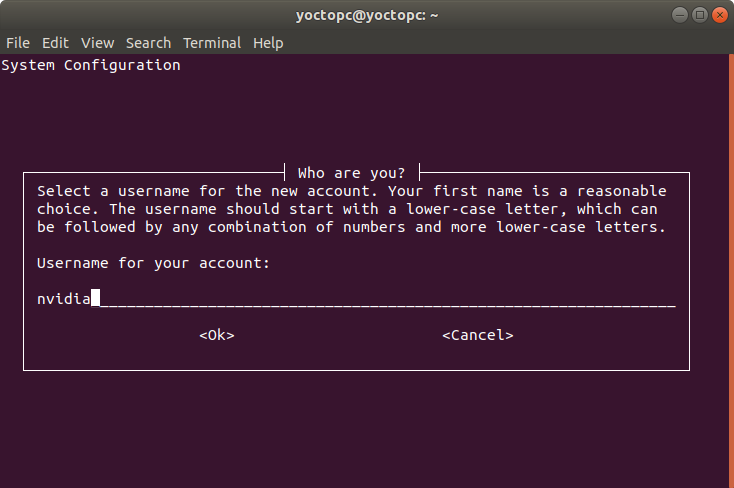
Choose a full name and user name for your Jetson Xavier NX.
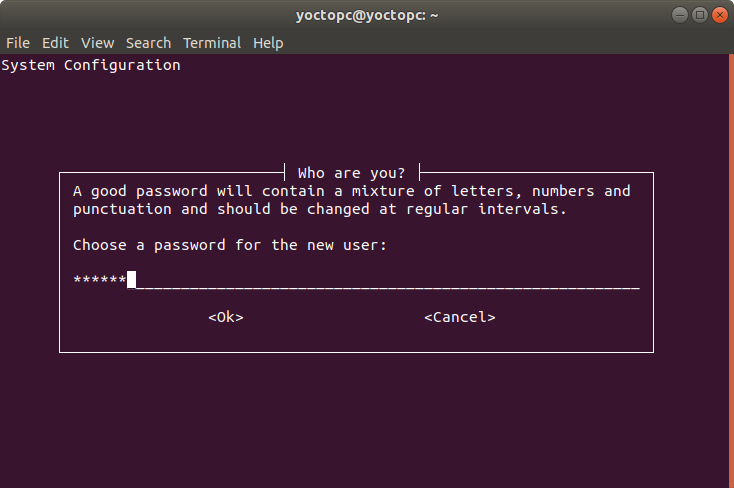
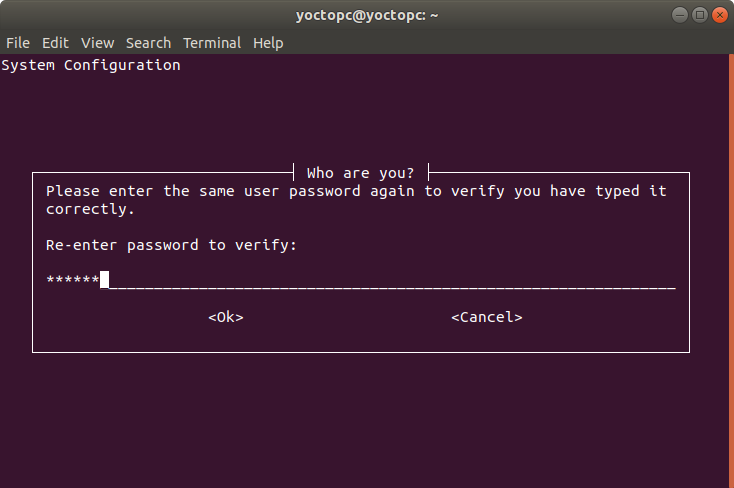
Set up a password, re-enter the password for verification.
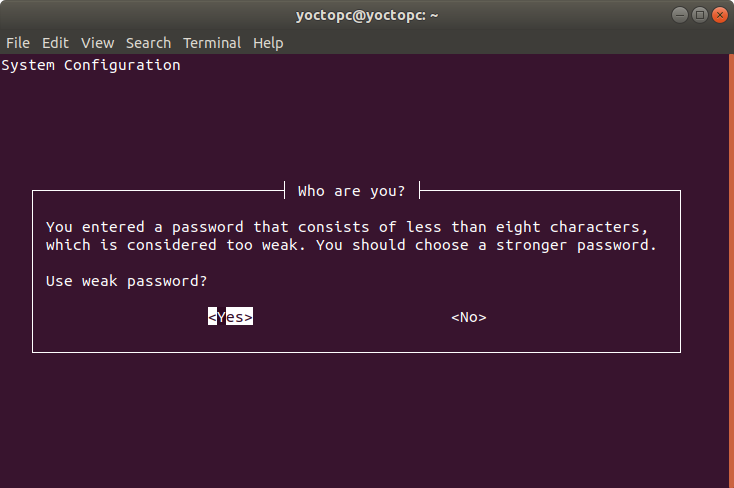
If your password is weak, you will receive the following warning. Click Enter if you want to continue with the weak password. Choose No if you want to change it.
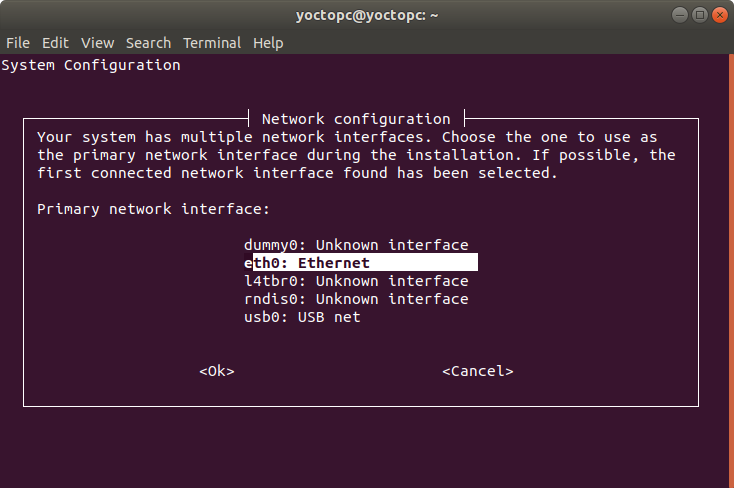
Choose the Network type. Since we connected the network using Ethernet, choose eth0.
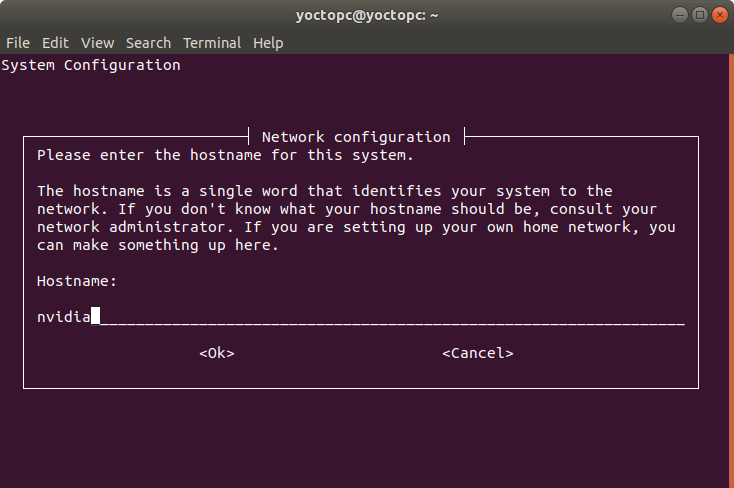
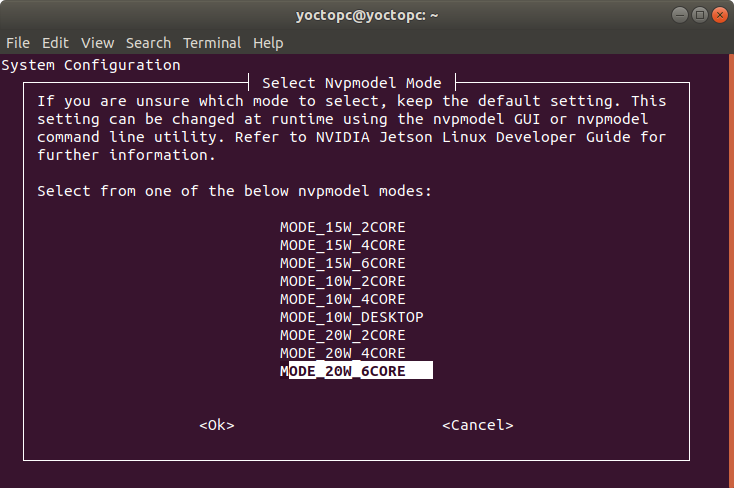
After the network configuration ended, type the hostname and select the power mode.
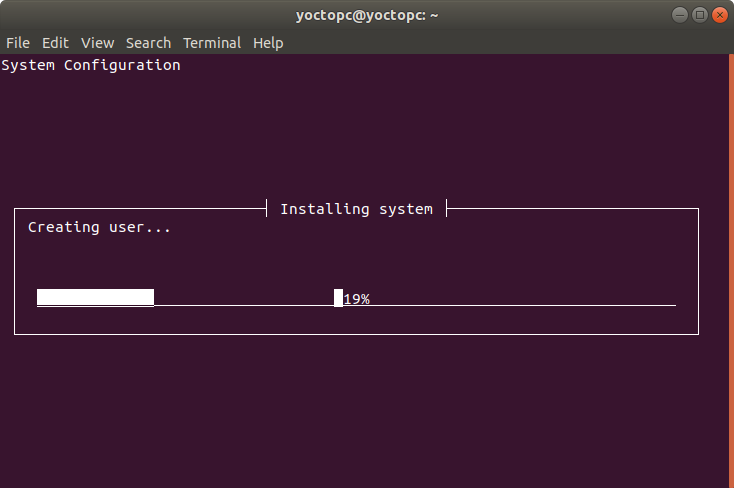
Wait until the installation is complete.
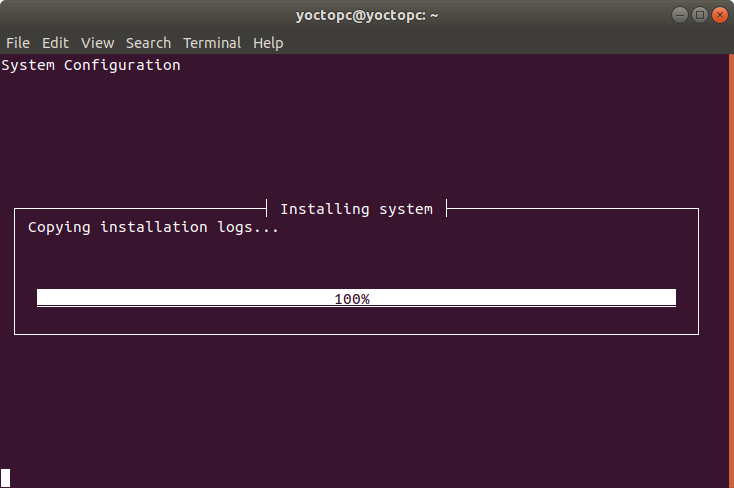
The screen terminal closed after the installation ended. Connect to Jetson Xavier NX again with the same command.
sudo screen /dev/ttyACM0 115200
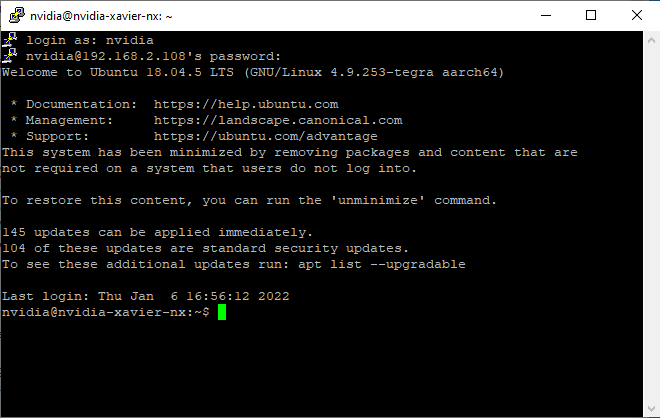
This time after entering the username and password, you can use your Jetson Xavier NX.
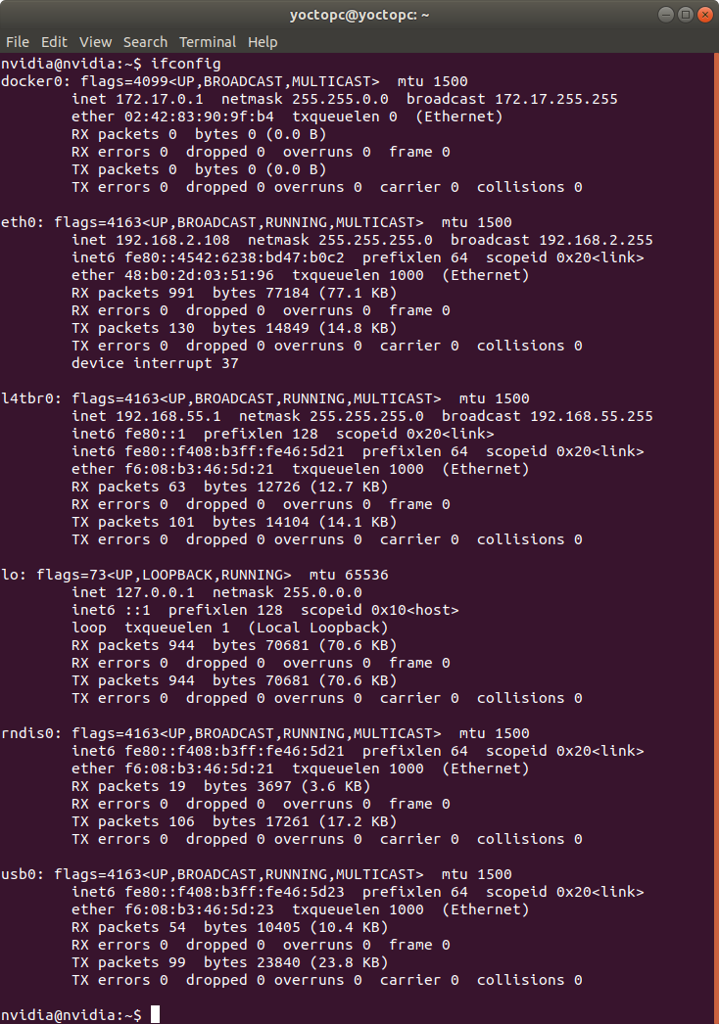
To use your Jetson Xavier NX over the network, use ssh after learning the IP address.
ifconfig
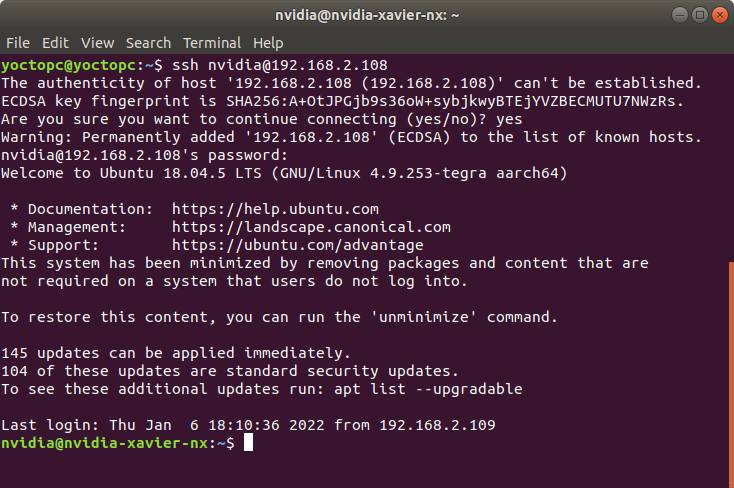
Open a new terminal and connect the board by using the following command. Click yes if you receive the following warning and enter the password.
ssh nvidia@{ip-address}

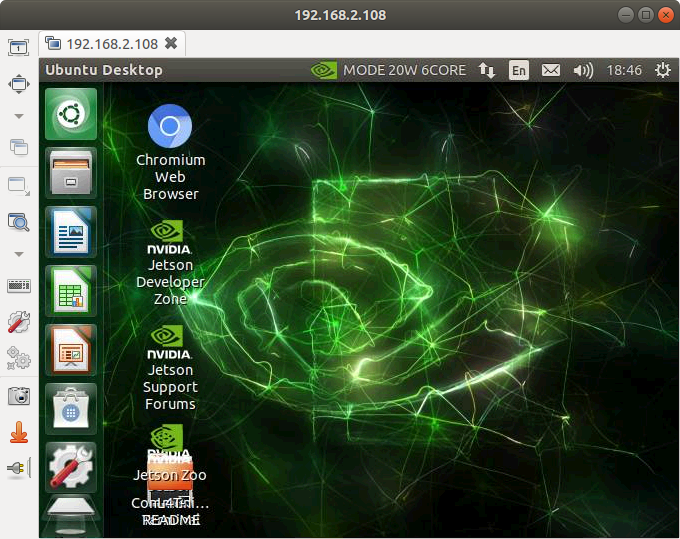
You can now start using Jetson Xavier NX even if you remove the USB cable.
How to Make Headless Installation for Jetson Xavier NX on Windows Host?
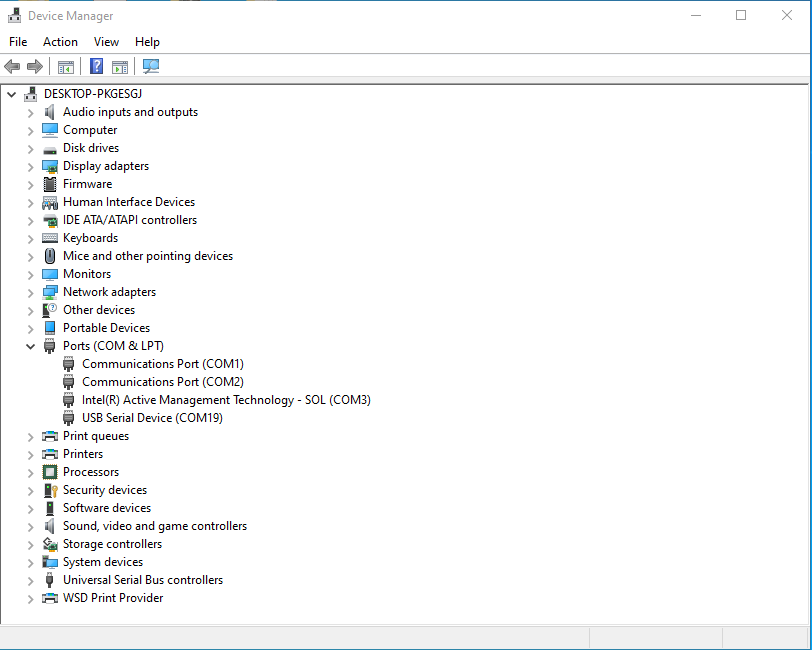
To complete headless installation for Jetson Xavier NX on Windows Host, check the port name on the Device Manager / Ports. The module uses COM19 port in our PC.
You should use a serial terminal application for Windows such as PuTTY as in this post.
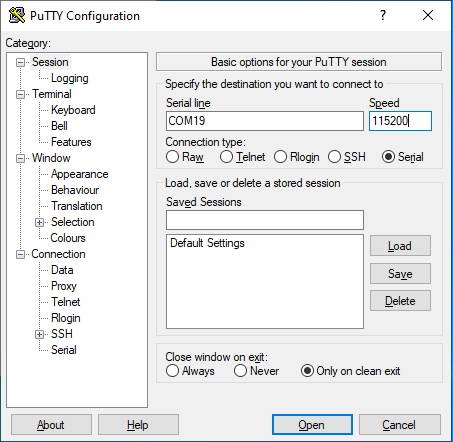
Open PuTTY, choose Serial, enter the port name (COM19) and speed (115200).
Complete the System Configuration Settings as explained before. When you connect to Jetson Xavier NX using the puTTY again, you will access on it. Enter the user name and password you specified before.

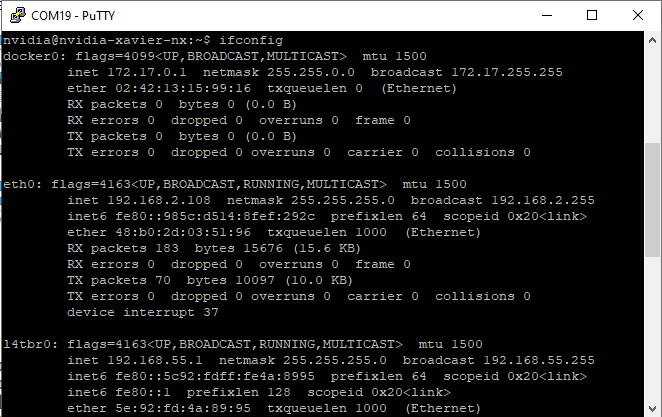
To connect the Jetson after removing the USB cable, check the IP address by running the following command.
ifconfig
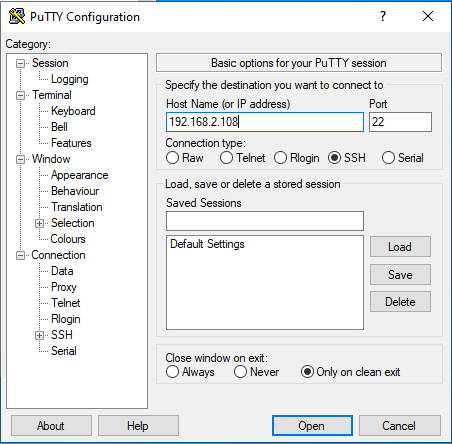
Open puTTY again, choose SSH and enter the IP address.
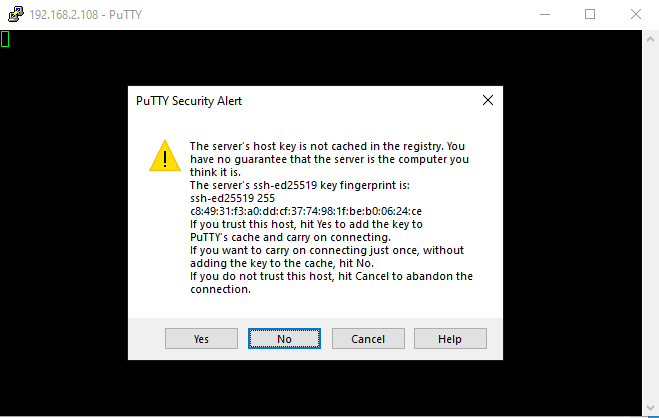
If you receive such an alert, click Yes. (If you will use it once, click No.)
After entering username and password, you can use your Jetson Xavier NX even after removing USB cable.
[Optional] How to Enable Auto-Login for Jetson Xavier NX?
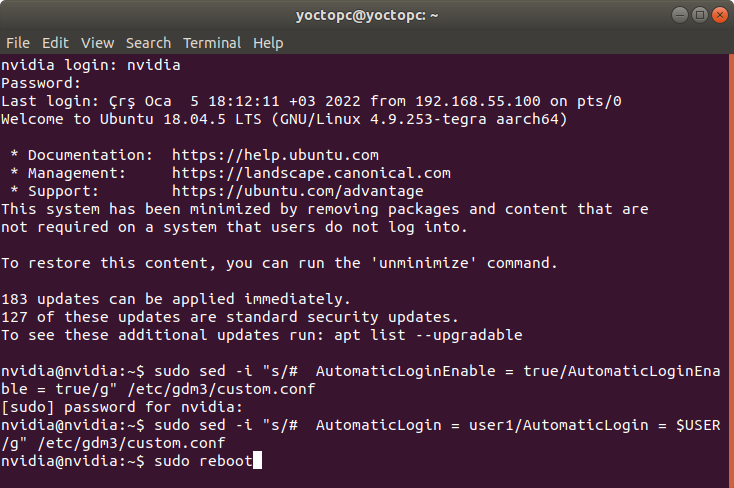
In headless installation, the system is installed by disabling automatic login. If you want to use your device with VNC viewer without any HDMI connection, you should enable it. To do this, type these commands in serial connection to enable automatic login and reboot the device.
sudo sed -i "s/#  AutomaticLoginEnable = true/AutomaticLoginEnable = true/g" /etc/gdm3/custom.conf
sudo sed -i "s/#  AutomaticLogin = user1/AutomaticLogin = $USER/g" /etc/gdm3/custom.conf
sudo reboot
To avoid kernel update with "apt upgrade" or "apt-get upgrade" commands, please follow this guide on the Jetson module.
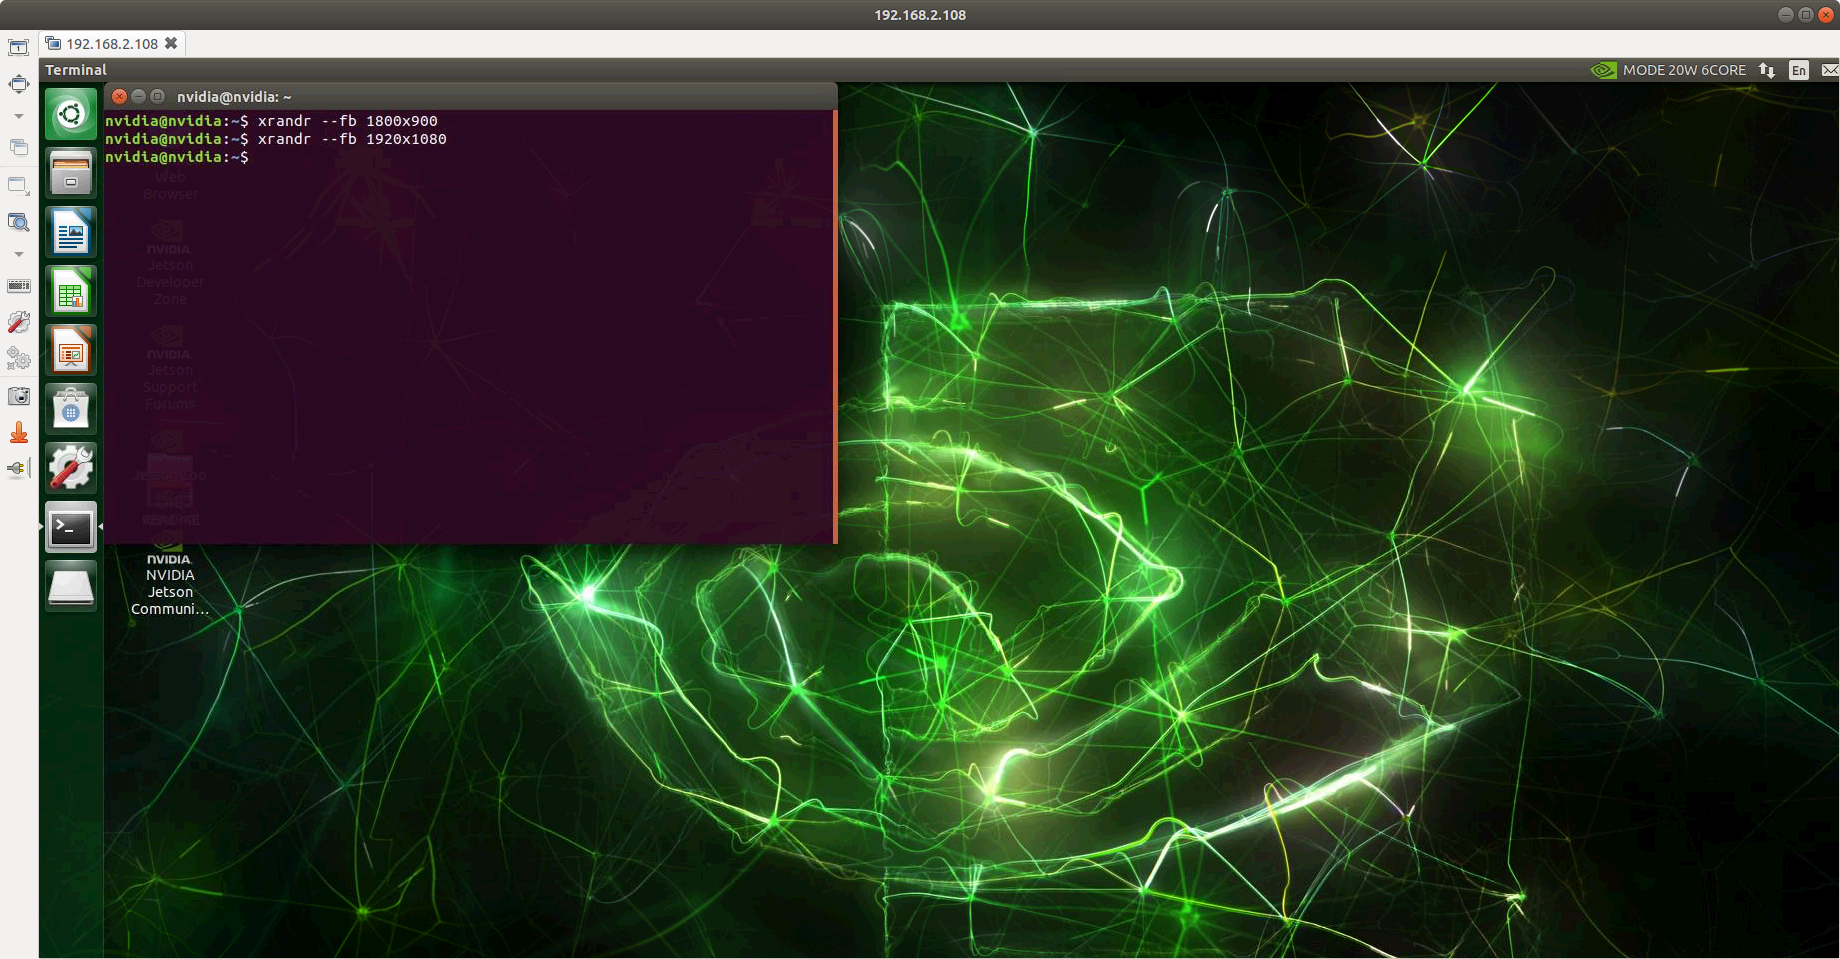
Hint: After completing the VNC server installation from here, the default resolution comes with 640x480. To increase the resolution on that, you can increase it according to your needs with this command:
xrandr --fb {custom_resolution}
Thank you for reading our blog post.