RAIBOARD-AGX Getting Started
WHAT YOU WILL LEARN?
1- Overview of RAIBOARD-AGX
2- Power Socket & Polarization
3- Jetpack Installation and Interface Guide
ENVIRONMENT
RAIBOARD-AGX is industrial carrier board for NVIDIA Jetson AGX Orin SoM modules. We will explain how to get started with RAIBOARD-AGX on this blogpost.
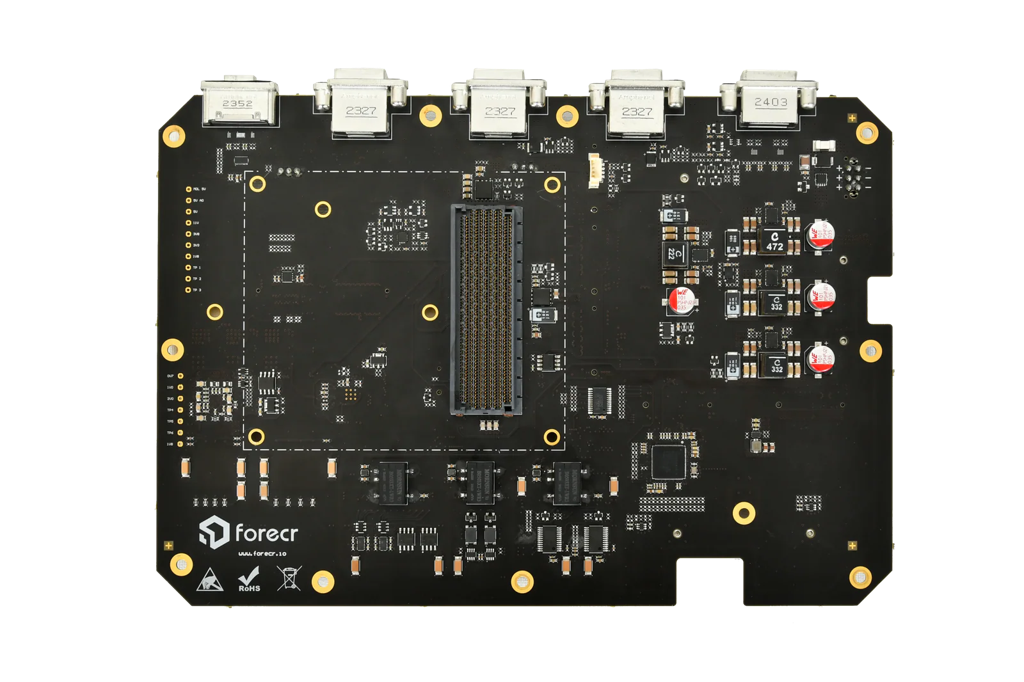
Overview of RAIBOARD-AGX
You can see the front view of RAIBOARD-AGX.

Before you plug in DC power cable, you should plug in Ethernet cable, keyboard and mouse USB cables to USB ports, HDMI cable to HDMI port socket for monitoring the system and the Jetson AGX Orin™ module to its socket.
Power Socket & Polarization
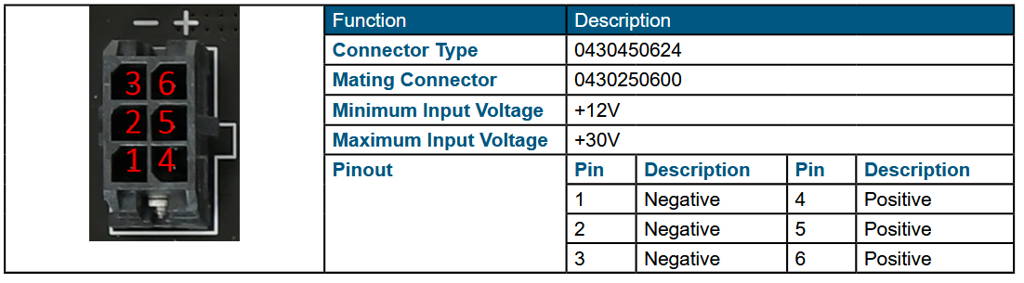
After connections are done, you can plug in the DC power cable to “DC IN” socket. The system runs as soon as you plug the DC power cable. The DC Power Source should be in the range of 12-30 Volt DC. You can find the DC Power socket when you open the package of the product.
You can see the power connector pinout below. First, second and third pins are negative polarization, fourth, fifth and sixth pins are positive polarization.
You can have DC Power Adapter, GPIO Mating Socket, HDMI Cable and Ethernet Cable as optional.
JetPack Installation & Interface Guide
After you energize the board, the system runs. The industrial box pc has preinstalled operating system (Ubuntu 20.04). When the Ubuntu Desktop show up, you will need to user name and password. Both the user name and the password are “nvidia”.
If you would like to view the definition of each connector, please click here.
If you would like to upgrade or downgrade the software version, please click here.
If you would like to use CANBus interface, please click here.
If you would like to use, Industrial Input Output pins, please click here.
If you would like to use serial communication interfaces (RS232,RS422 and RS485), please click here.
Thank you for reading our blog post.