
Hardware: DSBOX-NX2
OS: Ubuntu 18.04 LTS
Language: Bash
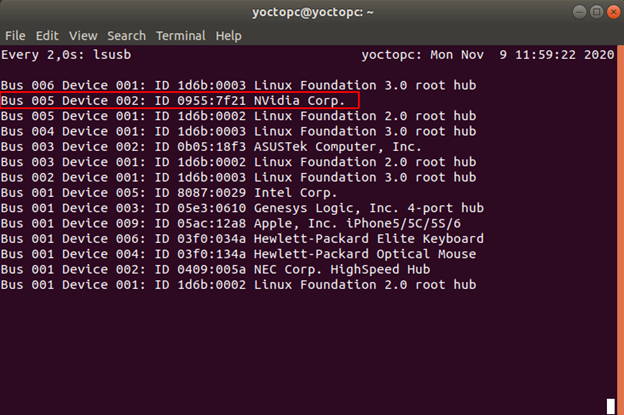
First, connect the recovery (between installer pc & DSBOX-NX2's recovery usb), ethernet & power connection of your DSBOX-NX2. Open a terminal on your installer pc then type "watch lsusb".
When DSBOX-NX2's power connector plugged in,
• press power button then wait for boot led lights up.
• press reset & recovery buttons together
• release reset button and the recovery button after 3 seconds later.
You should see "NVidia Corp." title in the terminal.
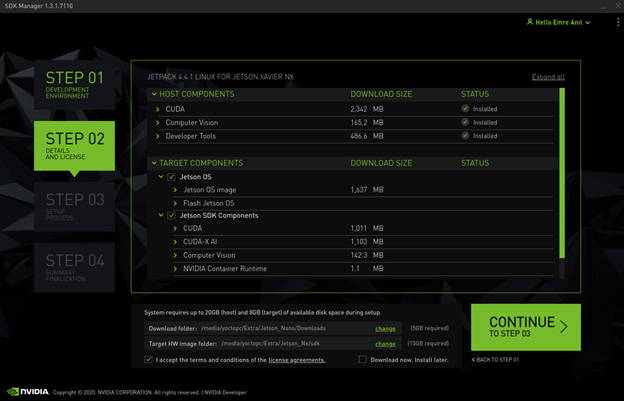
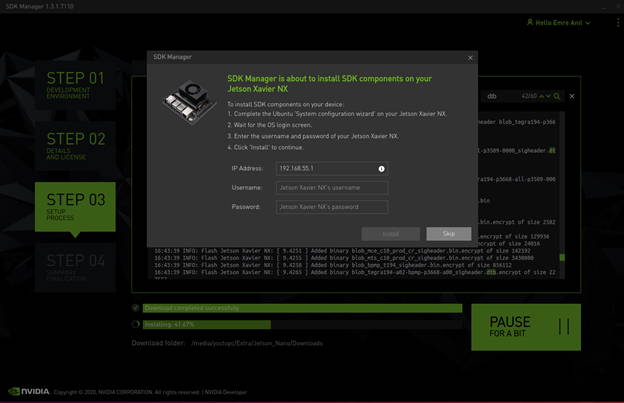
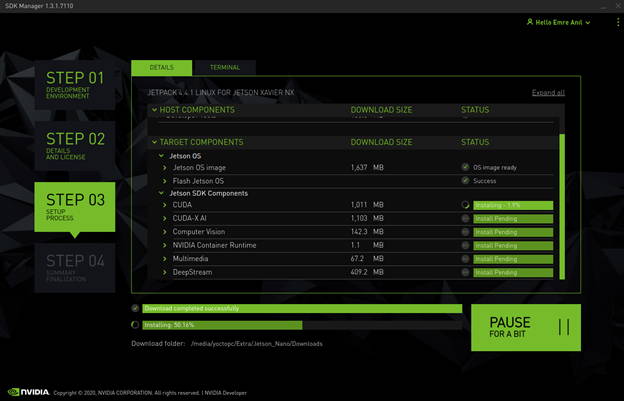
Next, set your configurations in the Nvidia SDK Manager.

Accept the license agreement and continue to step 3.
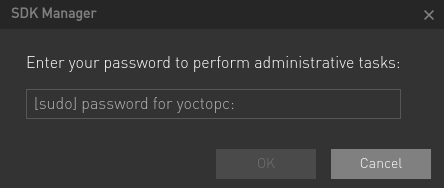
Nvidia SDK Manager asks your password to installation. Fill it and continue.
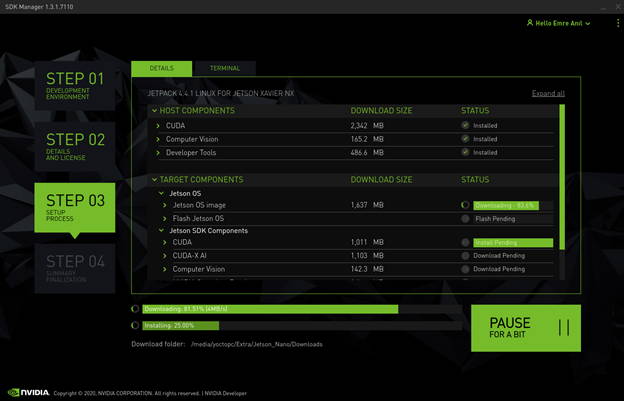
After all packages have been downloaded, Jetson OS will be installed on the Jetson Xavier NX.
The SDK Manager asks your DSBOX-NX2's username and password. We will continue from here after the second part.
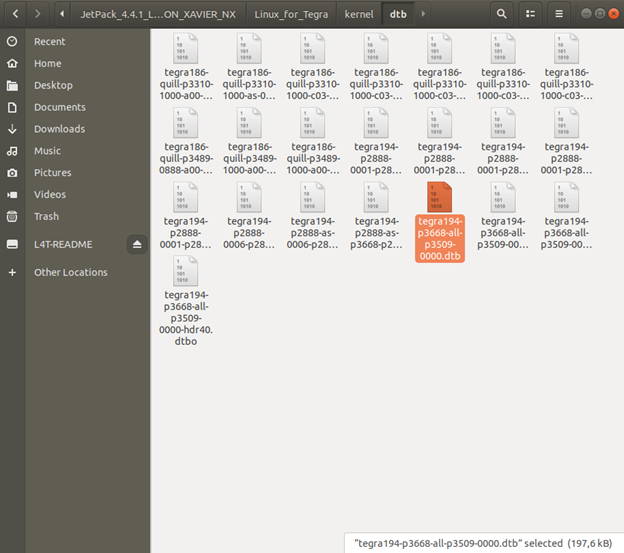
On the second part, copy your dtb file to kernel/dtb folder at the end of the post. The full path of the folder is (for JetPack 4.4.1):
~/nvidia/nvidia_sdk/JetPack_4.4.1_Linux_JETSON_XAVIER_NX/Linux_for_Tegra/kernel/dtb
Put your DSBOX-NX2 in recovery mode and check it from the terminal.

Open another terminal and type these commands:
cd ~/nvidia/nvidia_sdk/JetPack_4.4.1_Linux_JETSON_XAVIER_NX/Linux_for_Tegra/kernel/dtb
sudo ./flash.sh -r -k kernel-dtb jetson-xavier-nx-devkit-emmc mmcblk0p1
Once the dtb file is successfully updated, configure your DSBOX-NX2's Ubuntu installation progress (language, keyboard type, location, username & password etc.).
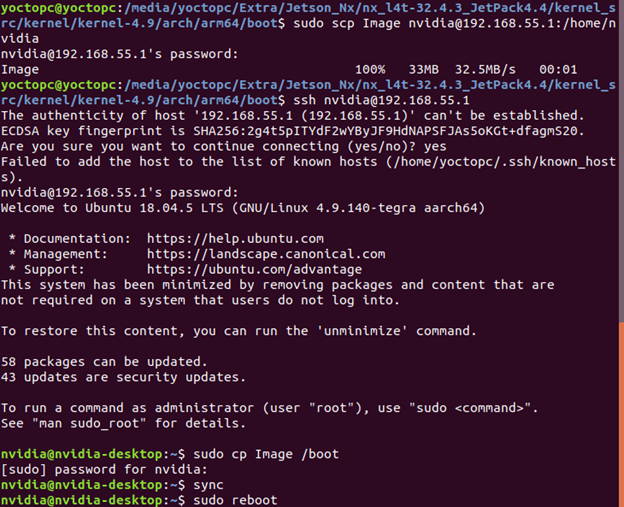
After ubuntu installation copy the kernel image which attached below to the DSBOX-NX2 from host pc with scp command.
sudo scp Image nvidia@192.168.55.1:/home/nvidia
Connect to your DSBOX-NX2 via ssh then execute the below commands.
ssh nvidia@192.168.55.1
sudo cp Image /boot
sync
sudo reboot
To avoid kernel update with "apt upgrade" or "apt-get upgrade" commands, please follow this guide on the Jetson module.
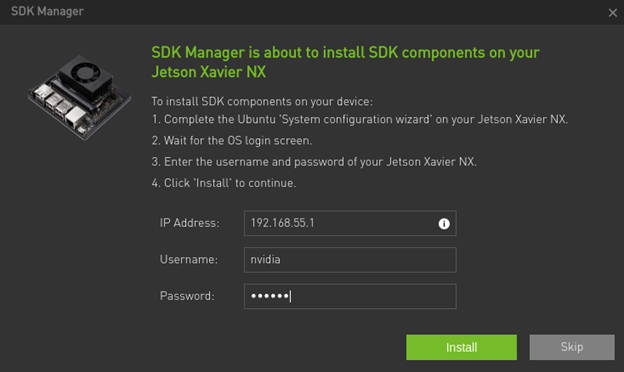
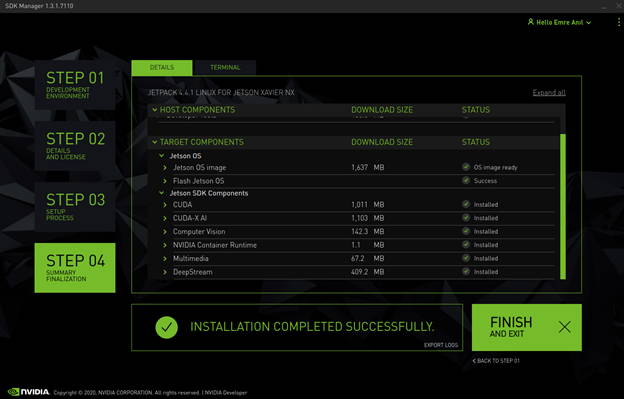
Finally, complete the SDK Manager installation progress. Type your username and password then click "Install".
Thank you for reading our blog post.