DSBOARD-AGXMAX CANBus Interface Tutorial
WHAT YOU WILL LEARN?
1- The pinout of I/O connector
2- Examples of can-utils tools
ENVIRONMENT
Hardware: DSBOARD-AGXMAX
In this blog post, we will test the CANBus interface of DSBOARD-AGXMAX.
The Pinout of I/O Connector

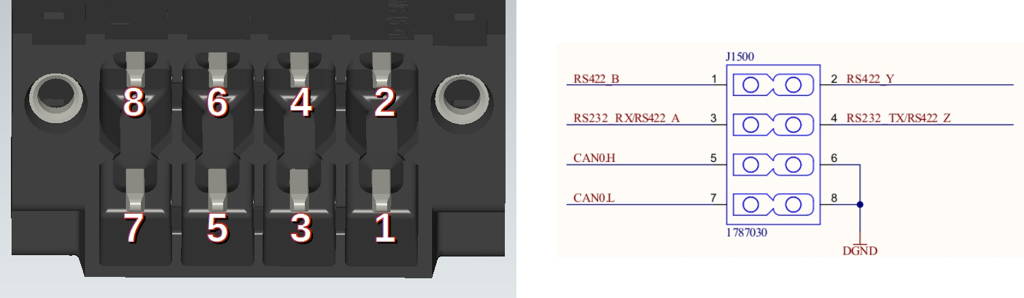
First, let's look over the 8 pin IO connector. On the connector, there are 4 serial communication, 2 ground, 2 CANBus pins.
Examples of can-utils Tools
To test CAN Bus functionality, we used a DSBOX-TX2NX as a test equipment (It has 120Ω termination resistor included). (If you use a USB-CAN adapter, connect that adapter to the USB port of the host PC and install its driver software if necessary.) To the other side of the connector, connect your device’s CAN pins.
On host side, be sure that you are using same bitrate with your device.
On next step, activate CAN drivers and activate CAN interface on DSBOARD-AGXMAX with the following commands below:
sudo busybox devmem 0x0c303010 32 0x0000C400
sudo busybox devmem 0x0c303018 32 0x0000C458
sudo modprobe can
sudo modprobe can_raw
sudo modprobe mttcan
sudo ip link set can0 type can bitrate 500000 dbitrate 2000000 berr-reporting on fd on
Now, you can use can-utils tools to communicate.
Use cangen to write random data:
cangen can0 -v
Use cansend to write data:
cansend can0 123#1122334455667788
Use candump to listen bus:
candump can0
Thank you for reading our blog post.